Anchors for Asphalt — Types, Installation Methods & Load Ratings (2026)
Quick Answer: Best Anchors for Asphalt
Epoxy (chemical) anchors are the most reliable choice for asphalt — two-part epoxy fills the voids in the pavement matrix and bonds chemically to aggregate, giving far better pullout resistance than mechanical anchors. For light-duty applications like sign posts and bike racks, asphalt screw anchors are the fastest option. Wedge and sleeve anchors work in asphalt only when the pavement is at least 4 inches thick over a solid base. Never use standard concrete expansion anchors in thin or freshly laid asphalt.
Why Asphalt Anchoring Is Different from Concrete
Asphalt is a flexible, viscoelastic material — it moves. In summer heat it softens; in winter cold it becomes brittle. This thermal cycling is the primary reason mechanical expansion anchors that work perfectly in concrete tend to loosen and fail in asphalt over time. The expansion force that locks a wedge anchor in concrete simply cannot overcome the creep and relaxation of hot mix asphalt under repeated load and temperature change.
Asphalt also contains internal voids — typically 3–8% air void content in a well-compacted mix. These voids mean a drilled hole has an irregular surface, reducing the contact area available for mechanical anchors. Epoxy anchors solve this by flooding the hole and filling voids, creating a much larger bonded surface. For deeper context on asphalt composition and how aggregate and binder interact, see our asphaltic concrete guide.
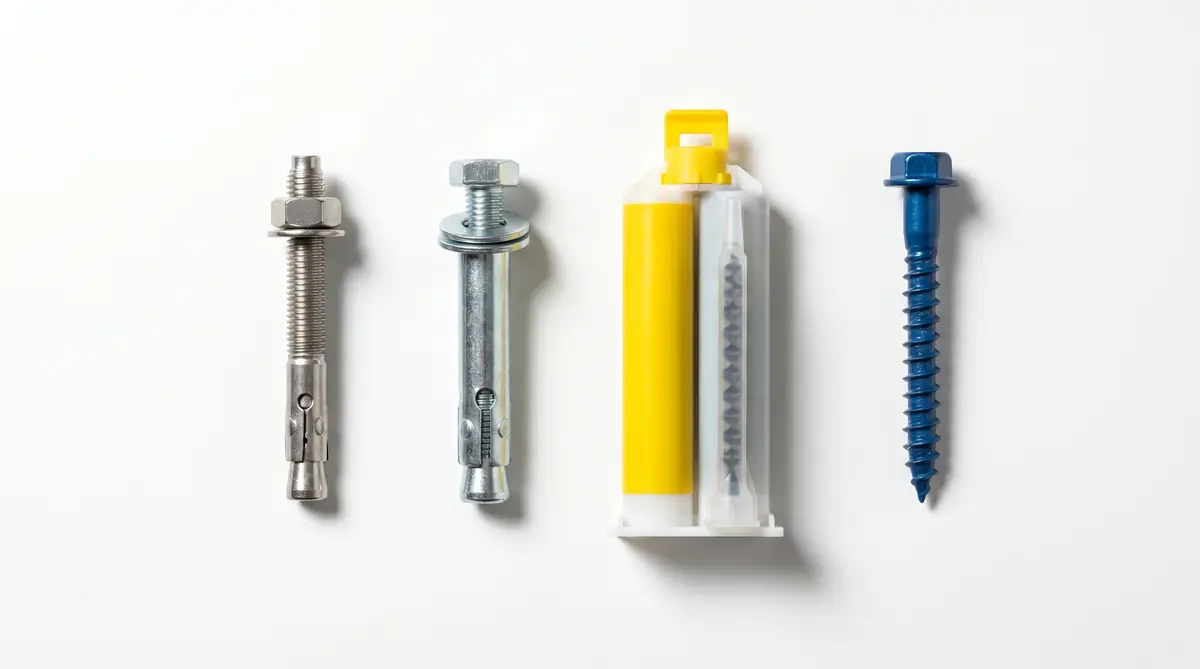
Anchor Types for Asphalt
| Anchor Type | Best Use | Min Asphalt Depth | Load Capacity | DIY Friendly |
|---|---|---|---|---|
| Epoxy / Chemical Anchor | Bollards, guard rails, fencing, structural posts | 3 inches | High (600–4,000 lbs tensile depending on diameter) | Yes |
| Asphalt Screw Anchor | Sign posts, bike racks, speed bump bolts, light fixtures | 2 inches | Low–Medium (200–800 lbs) | Yes |
| Wedge Anchor | Heavy equipment pads, machinery mounts (over concrete base) | 4+ inches over concrete | Medium (if over concrete base) | Yes |
| Sleeve Anchor | Signage, railings in thicker asphalt sections | 4 inches | Low–Medium | Yes |
| Cast-in-Place Anchor | New construction — bollards, posts set during paving | N/A (set before paving) | Very High | No — requires paving crew |
| Surface Mount Base Plate | Removable bollards, temporary barriers, equipment | 2 inches (for bolts) | Medium (depends on bolt pattern) | Yes |
Epoxy Anchors — Best Choice for Asphalt
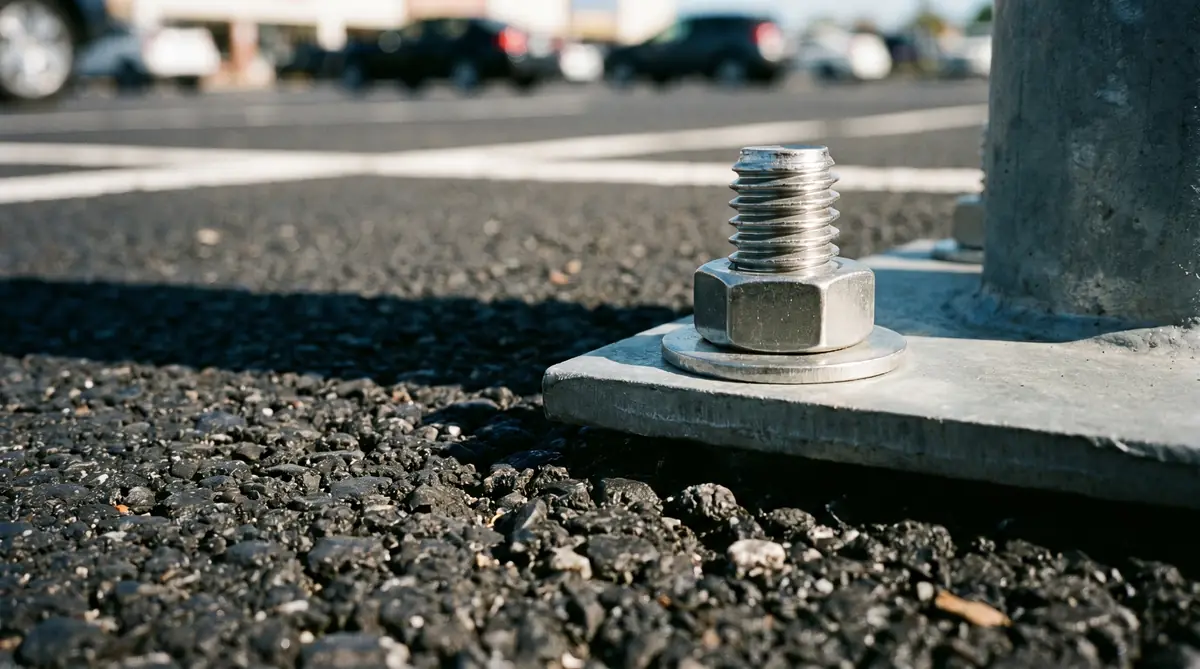
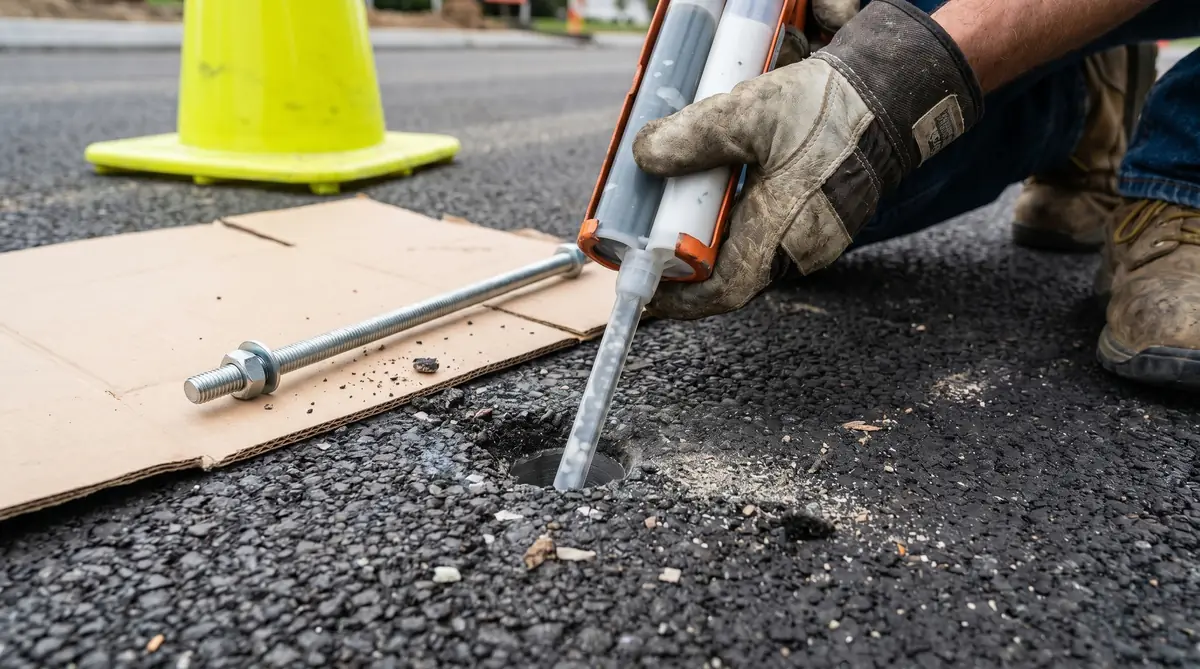
Two-part epoxy (or vinylester) anchors are the professional standard for asphalt fastening where load capacity matters. The epoxy is injected into a clean, blown-out hole using a cartridge gun, then the threaded rod or bolt is inserted and held plumb while the epoxy cures. As it hardens, the epoxy keys into the aggregate surface and fills all voids — producing an anchor that is effectively monolithic with the surrounding pavement.
Epoxy Cure Time by Temperature
| Temperature | Working Time | Minimum Load Time | Full Cure |
|---|---|---|---|
| Below 40°F (4°C) | Not recommended | — | — |
| 40–55°F (4–13°C) | 15–20 min | 6–8 hours | 48 hours |
| 55–75°F (13–24°C) | 8–12 min | 3–4 hours | 24 hours |
| 75–95°F (24–35°C) | 4–6 min | 1–2 hours | 8–12 hours |
| Above 95°F (35°C) | 2–3 min (work fast) | 45 min–1 hour | 4–6 hours |
Wedge & Sleeve Anchors in Asphalt
Mechanical expansion anchors (wedge and sleeve types) rely on outward pressure against the hole wall to generate holding force. In concrete this works because concrete is rigid and incompressible. In asphalt, the same outward pressure causes the surrounding material to deform gradually — particularly in warm weather — reducing clamp force over time.
Wedge and sleeve anchors are only appropriate in asphalt when: (1) the asphalt is at least 4 inches thick, (2) a hard concrete or compacted granular base exists directly below, and (3) the anchor is long enough to reach partially into that base. In this configuration the anchor's lower portion bears against the more stable sub-layer while the asphalt provides lateral confinement. For any permanent structural application, specify epoxy anchors instead.
Asphalt Screw Anchors
Asphalt-specific screw anchors (also called asphalt anchors or pavement anchors) have a coarse, wide-pitch thread designed for the softer, aggregate-filled asphalt matrix. Common applications include sign post bases, speed bump attachment bolts, bike rack footings, and light pole base plates. They are installed by drilling a pilot hole, then threading the anchor in with an impact driver or wrench. Installation takes minutes with no mixing or cure time.
Load ratings are lower than epoxy anchors — typically 200–800 lbs in tension depending on diameter and embedment depth — but for most light-duty pavement fixture applications, this is sufficient. Re-torque annually, as thermal cycling gradually loosens the thread engagement in asphalt.
Installation Steps (All Anchor Types)
- Mark and plan layout: Mark anchor locations with chalk or marking paint. Confirm the asphalt is at minimum the required thickness — probe with a thin rod at one location or check project records. Avoid anchoring within 6 inches of a pavement joint, crack, or edge.
- Drill the hole: Use a rotary drill (not hammer mode) with a carbide-tipped masonry bit. Hammer mode fractures asphalt aggregate and enlarges the hole unevenly. Drill to the specified depth plus 1/2 inch for debris clearance. See the drill bit table below for correct sizing by anchor type.
- Clean the hole thoroughly: This is the most critical step for epoxy anchors. Blow out all dust and chips with compressed air, then brush the hole walls with a wire brush, then blow again. Dust contamination cuts epoxy bond strength by 30–50%.
- Install the anchor: For epoxy — inject from the bottom up, filling to 2/3 depth, then insert threaded rod with a slow twisting motion to distribute epoxy evenly. For screw anchors — thread in with an impact driver to specified torque. For wedge/sleeve — insert and strike or tighten to spec.
- Cure and protect: For epoxy, mark the anchor and keep traffic and load off it for the full minimum load time (see cure table above). Protect from rain for the first 30 minutes while epoxy is still fluid.
- Load test: For structural applications, perform a proof load test after full cure — apply 150% of design load with a torque wrench or pull tester and confirm no movement. Document and photograph results.
Drill Bit & Hole Size by Anchor
| Anchor Diameter | Epoxy Anchor Hole | Wedge/Sleeve Hole | Screw Anchor Pilot Hole | Min Embedment |
|---|---|---|---|---|
| 3/8 inch | 1/2 inch | 3/8 inch | 5/16 inch | 3 inches |
| 1/2 inch | 5/8 inch | 1/2 inch | 3/8 inch | 3.5 inches |
| 5/8 inch | 3/4 inch | 5/8 inch | 1/2 inch | 4 inches |
| 3/4 inch | 1 inch | 3/4 inch | 5/8 inch | 5 inches |
| 1 inch | 1-3/8 inch | 1 inch | 3/4 inch | 6 inches |
Load Ratings by Anchor Type & Asphalt Thickness
| Anchor Type | 2–3" Asphalt | 3–4" Asphalt | 4–6" Asphalt | Load Type |
|---|---|---|---|---|
| Epoxy (1/2" rod) | 800–1,200 lbs | 1,200–2,000 lbs | 2,000–3,500 lbs | Tensile (pullout) |
| Epoxy (3/4" rod) | 1,500–2,500 lbs | 2,500–4,000 lbs | 4,000–6,000 lbs | Tensile (pullout) |
| Wedge anchor (1/2") | Not recommended | 400–700 lbs | 700–1,200 lbs | Tensile |
| Screw anchor (1/2") | 300–500 lbs | 400–700 lbs | 600–900 lbs | Tensile |
| Surface mount plate (4-bolt) | 1,000–3,000 lbs | 2,000–5,000 lbs | 3,000–8,000 lbs | Shear & moment |
Load values are approximate and assume clean holes, proper installation, and cured asphalt at 70°F. Derate 25–40% in hot weather (>90°F surface temp). Always confirm with a structural engineer for life-safety applications. Reference: Hilti anchor design methodology.
Common Applications
| Application | Recommended Anchor | Typical Size | Notes |
|---|---|---|---|
| Fixed bollard | Epoxy threaded rod | 3/4" rod, 8–10" deep | Use base plate for load distribution |
| Removable bollard | Surface mount sleeve + epoxy bolts | 1/2" bolts, 4-bolt pattern | Sleeve set in epoxy; bollard locks in/out |
| Sign post (light duty) | Asphalt screw anchor | 1/2", 4" embedment | Re-torque annually |
| Fence post | Epoxy or cast-in-place | 3/4" rod or direct set | Use post base plate where possible |
| Speed bump | Asphalt screw anchor | 3/8"–1/2", through pre-drilled bump | Min 4 anchors per bump section |
| Bike rack | Epoxy or screw anchor | 1/2", 4–6" embedment | 2 anchors per leg minimum |
| Guard rail post | Cast-in-place or epoxy | Engineering specified | Life-safety — engineer required |
| Equipment pad tie-down | Epoxy threaded rod | 5/8"–3/4" rod | Check vibration loads — may need isolation pad |
Seasonal & Temperature Considerations
Fresh asphalt is the worst surface for anchoring. Newly laid HMA contains residual heat and volatiles that prevent proper epoxy cure and reduce mechanical grip. Wait a minimum of 30 days after paving before installing any permanent anchors — 90 days is preferable for heavily loaded applications.
In cold weather, asphalt becomes brittle and more susceptible to cracking during drilling. Use slow drill speeds, avoid hammer mode entirely, and choose a drill bit one size smaller than normal to reduce stress on the hole walls. Cold-temperature epoxy formulations are available for installations below 40°F if unavoidable.
In extreme heat, asphalt at the surface can reach 150°F — at this temperature the pavement is significantly softer and anchor holding strength drops sharply. Schedule heavy-load anchor installations for early morning in summer months when pavement temperatures are lowest.
Failure Modes to Avoid
- Drilling in hammer mode: Shatters aggregate around the hole, leaving a loose, weakened shell that collapses under load. Always use rotary mode only in asphalt.
- Dirty holes before epoxy injection: Dust contamination cuts bond strength by up to 50%. Blow out, brush, blow again — every time.
- Anchoring too close to an edge or crack: The pavement section between the anchor and the edge or crack has no confinement — it will split under load. Maintain minimum 6-inch edge distance.
- Using wrong epoxy temperature range: Epoxy installed outside its rated temperature range will not cure properly. Check the cartridge label — minimum and maximum application temperatures vary by product.
- Loading before full cure: Partial cure means partial strength. Traffic vibration on a freshly epoxied anchor before cure time is complete can break the bond permanently — the anchor will feel set but will pull out at a fraction of rated load.
- Ignoring pavement thickness: Anchoring into 2-inch overlay asphalt as if it were 6-inch full-depth pavement is the single most common cause of anchor failure. Measure or probe thickness before specifying anchor length.
If the surrounding asphalt is already cracked or deteriorated, repair the area first before installing anchors — see our asphalt repair kit guide for patching products and methods. For large-scale anchor installation projects requiring a professional paving contractor, confirm they have experience with anchor layout and post-installation testing.
Frequently Asked Questions
What anchors work best in asphalt?
Epoxy (chemical) anchors for any load-bearing application — they fill voids, bond chemically, and resist thermal cycling far better than mechanical anchors. Asphalt screw anchors for light-duty fixtures (signs, bike racks, speed bumps) where fast installation matters more than maximum load capacity.
Can you use concrete anchors in asphalt?
Wedge and sleeve anchors rated for concrete can be used in asphalt provided the pavement is at least 4 inches thick over a hard base. Expect significantly lower load ratings than the concrete specification — derate by at least 50% and monitor for loosening over time due to thermal cycling.
How do you anchor a post in asphalt?
Drill an oversized hole (1.5–2x post diameter), inject two-part epoxy from the bottom up, insert the post or anchor rod while epoxy is wet, hold plumb, and cure fully before loading. For removable posts, use a surface-mount base plate bolted with epoxy anchors rather than embedding the post directly.
How deep should anchors be in asphalt?
Minimum 3–4 inches for light loads (signs, bike racks); 6–10 inches for structural loads (bollards, guard rails). For embedment deeper than the asphalt layer, drill through into the sub-base or concrete base beneath. Fill the entire hole depth with epoxy for maximum pullout resistance.
Can you drill into asphalt?
Yes — use a rotary drill (not hammer mode) with a carbide-tipped masonry bit at moderate speed. Hammer action fractures aggregate and damages hole edges. Clear chips frequently during drilling and avoid drilling in very hot weather when the surface is soft.