Paving for Fire Pit — Best Materials, Heat Safety & Installation Guide (2026)
Quick Answer: Best Paving for a Fire Pit
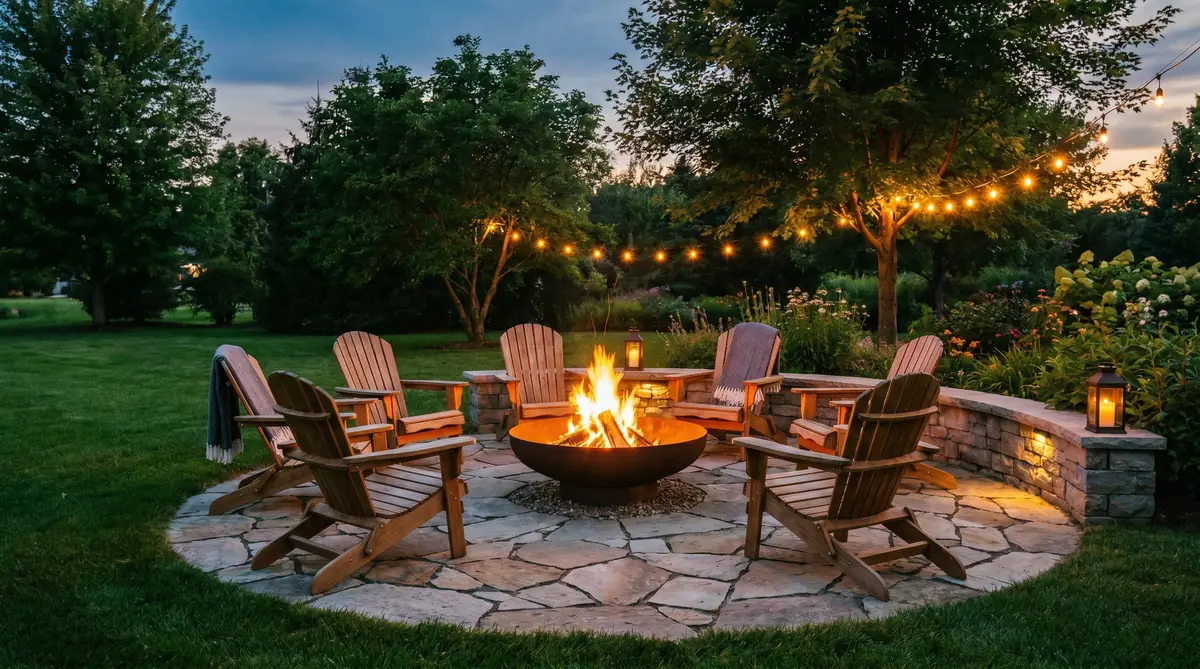
Concrete pavers and natural flagstone are the top choices — both handle heat well, are DIY-friendly, and cost $3–$12/sq ft in materials. Brick is a close third. The paved area should extend at least 7–10 feet from the fire pit center in all directions. Never use asphalt near an open flame — it's petroleum-based and heat-sensitive. Gravel and decomposed granite work as budget alternatives with no base prep required.
Material Comparison — Fire Pit Paving Options
| Material | Heat Resistance | DIY-Ability | Material Cost / sq ft | Look | Best For |
|---|---|---|---|---|---|
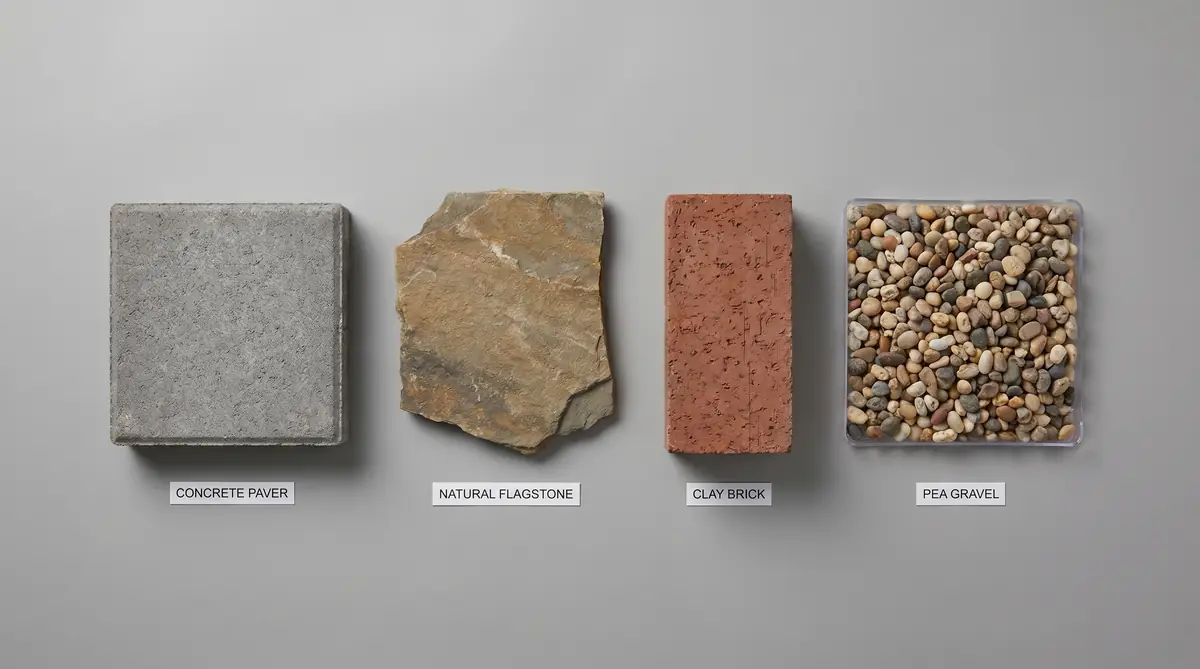
| Concrete pavers | Excellent | Easy | $3–$8 | Clean, modern or traditional | Most versatile all-around choice |
| Natural flagstone | Excellent | Moderate | $4–$12 | Natural, rustic, organic | Natural / cottage aesthetic |
| Clay brick | Excellent | Moderate | $3–$7 | Classic, warm red/brown tones | Traditional cottage or colonial look |
| Pea gravel | Excellent | Very easy | $1–$3 | Casual, natural | Budget builds, low-maintenance |
| Decomposed granite | Excellent | Very easy | $1–$3 | Desert / natural earthy tone | Southwest style, permeable drainage |
| Poured concrete | Good (can crack under heat cycling) | Difficult | $4–$8 (installed) | Smooth, utilitarian | Large flat areas, lower priority for fire pit immediate zone |
| Asphalt | ❌ UNSAFE near open flame | — | — | — | Do not use within 10 ft of fire pit |
| Composite decking | ❌ UNSAFE — plastic melts | — | — | — | Do not use within 10 ft of fire pit |
Material Deep-Dives
Concrete Pavers — Best All-Around Choice
Concrete pavers are the go-to for fire pit patios for good reason: consistent sizing makes installation straightforward, they're widely available at every home improvement store, heat resistance is excellent, and they come in dozens of colors and profiles to match any aesthetic. Tumbled pavers add a natural, aged look; smooth-face pavers give a contemporary feel.
Thickness: Use 2-inch (60mm) pavers for pedestrian patio areas. 2.375-inch (60mm) or thicker for any area that will see vehicle traffic.
Avoid: Thin 1-inch patio stones — they crack under chair leg point loads and are not suitable for fire pit areas.
Sealing: Optional — a penetrating sealer every 2–3 years protects against soot and staining.
Natural Flagstone — Premium Natural Look
Natural flagstone — bluestone, Pennsylvania slate, limestone, or sandstone — gives a fire pit patio an organic, timeless character that concrete can't fully replicate. Each piece is unique. Heat resistance is excellent for all flagstone types. Irregular shapes require more cutting and fitting time.
Best stones for heat resistance: Bluestone and slate perform best. Limestone and sandstone are adequate but more porous.
Avoid: Smooth-polished stone directly under the fire bowl — heat vaporizes trapped moisture and can cause spalling. Use rough-split or honed finish, not high-polish.
Setting: Can be dry-set in sand (easier) or mortar-set (more permanent). Dry-set is recommended for DIY — easier to adjust and repair.
Clay Brick — Classic and Heat-Proven
Kiln-fired clay brick has been used around fire for centuries — it's one of the most heat-proven hardscaping materials available. Outdoor paving brick (SW grade — severe weathering) handles freeze-thaw cycles and radiant heat equally well. The warm red-brown tones complement fire pit settings naturally.
Use SW-grade brick only — not salvaged interior brick or MW (moderate weathering) grade, which spall in freeze-thaw climates.
Patterns: Herringbone gives the best interlock strength; running bond is simpler to lay. Both work excellently around fire pits.
Pea Gravel & Decomposed Granite — Budget-Friendly
Loose aggregate surfaces are the simplest and most affordable fire pit surround — no base prep beyond excavation and a landscape fabric layer to suppress weeds. Pea gravel (3/8–1/2 inch smooth rounded stone) is comfortable underfoot and drains perfectly. Decomposed granite compacts to a firm surface with a natural earthy appearance.
Downsides: Gravel scatters under foot traffic and chair movement — plan to rake periodically. Decomposed granite can muddy in heavy rain if not stabilized. Use edging restraints (metal or plastic) to keep aggregate contained within the defined patio area.
Depth: 3–4 inches of loose aggregate over landscape fabric over compacted soil.
Heat Safety — Clearances and Rules
| Safety Rule | Minimum Requirement | Recommended |
|---|---|---|
| Paved non-combustible surface radius | 7 ft from fire pit center | 10 ft from center |
| Distance from any structure (house, fence, shed) | 10 ft | 15–20 ft |
| Distance from overhead branches / utilities | 21 ft vertical clearance | 25 ft+ |
| Fire pit size vs patio size | Patio diameter = fire pit diameter × 4 | Fire pit diameter × 5–6 |
| Combustible materials (wood chairs, furniture) | Keep 3+ ft from fire pit edge | 5 ft from fire pit edge |
- Asphalt — petroleum-based, softens under heat, potential ignition risk
- Composite decking — plastic components melt and can ignite; wood composite chars
- Pressure-treated lumber — releases toxic arsenic-containing fumes when burned or exposed to extreme heat
- Rubber pavers — melt and release toxic black smoke under heat
- Polished stone directly under fire bowl — thermal shock spalls polished surfaces, sending sharp fragments outward
- Thin porcelain tile — thermal cycling causes cracking and dangerous spalling
How to Size Your Fire Pit Patio
| Fire Pit Diameter | Minimum Patio Diameter | Comfortable Patio Diameter | Approx. Paved Area (sq ft) |
|---|---|---|---|
| 24 inches (small) | 14 ft | 16–18 ft | 154–254 sq ft |
| 36 inches (standard) | 16 ft | 18–20 ft | 201–314 sq ft |
| 48 inches (large) | 18 ft | 20–24 ft | 254–452 sq ft |
| 60 inches (extra large) | 20 ft | 24–28 ft | 314–615 sq ft |
Use our Gravel Calculator to estimate base material quantities, or the Asphalt Calculator for any connected driveway or path work.
Base Preparation — Step by Step
-
Mark the patio perimeter
Drive a stake at the fire pit center point. Tie a string at your desired radius and walk the perimeter, marking with spray paint or a garden hose. Use a level and tape measure to confirm the circle is even. Mark 6 inches beyond your finished patio edge to allow for edging installation.
-
Excavate to depth
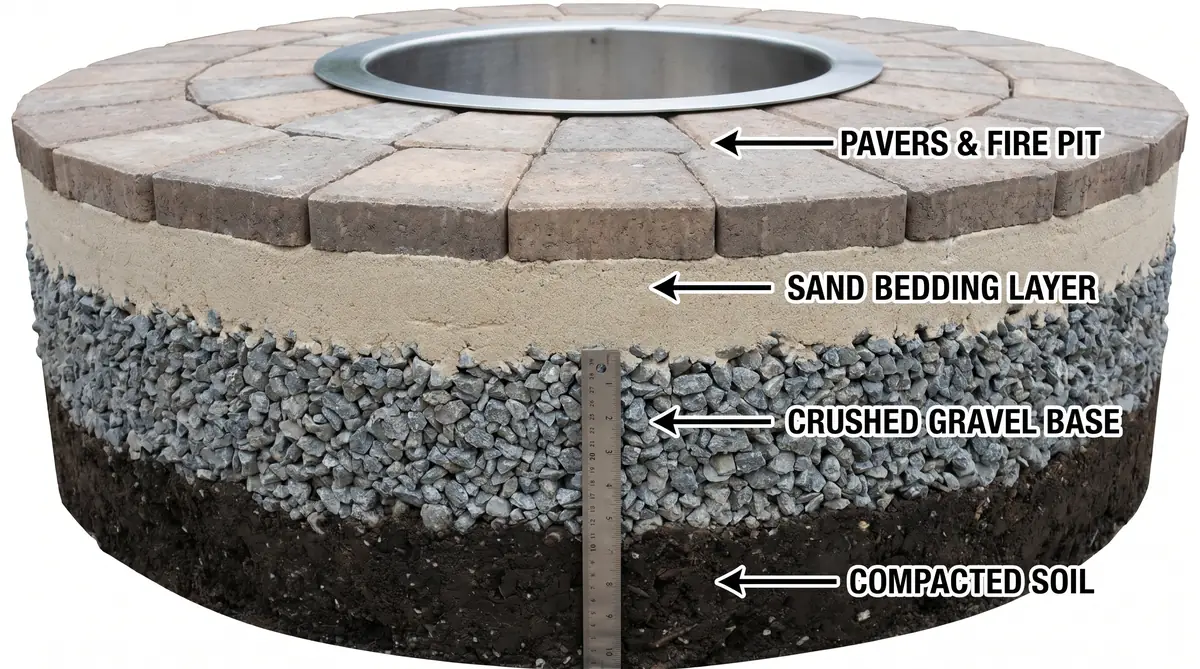
Dig out the patio area to a depth of 7–9 inches below finished grade: 4–6 inches for gravel base + 1 inch sand bedding + paver thickness (typically 2–2.5 inches). Remove all sod and organic material. The sub-base soil should be native undisturbed soil or compacted fill — never loose or organic soil.
-
Grade for drainage
Establish a slope of at least 1% (1/8 inch per foot) away from any structures. Use a level and grade stakes to verify consistent slope across the excavated area. Water pooling under pavers causes frost heave and base erosion — proper drainage is the single biggest factor in patio longevity.
-
Install landscape fabric (optional but recommended)
Lay woven geotextile fabric over the compacted subgrade before adding gravel. This prevents soil migration up into the gravel base while allowing water to drain through. Overlap seams by 6 inches. Skip this step only for gravel/DG surfaces where fabric is standard practice.
-
Place and compact crushed gravel base
Add 3/4-inch crushed stone (crusher run or clean gravel) in 2–3 inch lifts, compacting each lift with a plate compactor before adding the next. Total compacted depth: 4–6 inches. The base must be solid — any movement here translates directly to settled, uneven pavers above.
-
Screed a 1-inch sand bedding layer
Spread coarse concrete sand (not play sand or mason sand) over the compacted gravel and screed to a consistent 1-inch depth using two parallel pipes as guides. Do not compact the sand — it needs to remain loose so pavers can be set and adjusted. Screed in sections and avoid walking on the screeded sand before paver installation.
-
Lay pavers from the center outward
Start at the fire pit center point and work outward, placing pavers in your chosen pattern. Keep joints consistent (typically 1/16–1/8 inch for concrete pavers). Use a rubber mallet to set each paver — tap firmly to seat into the sand. Check level frequently with a straight edge; adjust sand depth as needed.
-
Install edge restraints
Before the final compaction, install rigid plastic or metal edging along the patio perimeter, pinned with 10-inch spikes every 12 inches. Edge restraints prevent the pavers from migrating outward under traffic and are what separates a patio that lasts 20 years from one that spreads apart in 3.
-
Compact and fill joints
Run a plate compactor over the entire paved surface (with a protective rubber pad to avoid scratching) to fully seat pavers into the sand base. Sweep polymeric sand (for locked joints) or regular coarse sand into the joints, compact again, and repeat until joints are filled. Mist with water to activate polymeric sand if used.
Layout Pattern Options
| Pattern | Difficulty | Look | Best For | Waste % |
|---|---|---|---|---|
| Running bond | Easy | Classic, clean | Rectangular pavers, beginner DIY | 5–8% |
| Herringbone (45°) | Moderate | Dynamic, strong interlock | High-traffic areas, best structural pattern | 10–15% |
| Basketweave | Easy–Moderate | Traditional, square feel | Square pavers, traditional settings | 5–8% |
| Circular fan | Difficult | Elegant, radiates from center | Round fire pit patios, feature focal point | 15–20% |
| Random flagstone | Moderate | Natural, organic, no two alike | Natural stone, cottage/rustic settings | 10–15% |
| Border + field | Moderate | Defined, professional | Any patio — contrasting border adds polish | 8–12% |
Drainage Considerations
Fire pit patios collect water from rain and snowmelt. Poor drainage causes frost heave, base erosion, and joint failure. Key drainage rules:
- Minimum 1% slope (1/8 inch per foot) away from all structures — 2% preferred
- Never slope toward the house foundation — always slope outward or toward a lawn area
- Permeable jointing (gravel or polymeric sand with drainage channels) allows water to pass through paver joints into the base
- If the site is naturally wet or poorly drained, install a French drain around the patio perimeter before building the base
- Gravel and DG surfaces are inherently permeable — excellent for wet sites where drainage is a concern
Maintenance by Material
| Material | Annual Maintenance | Reseal Frequency | Common Issues |
|---|---|---|---|
| Concrete pavers | Sweep, rinse, weed joints | Every 2–3 years (optional) | Joint weed growth, occasional settling |
| Natural flagstone | Sweep, rinse, check joints | Rarely needed | Moss growth in shade, occasional frost heave |
| Clay brick | Sweep, check for chips | Not typically required | Occasional brick replacement after freeze-thaw spalling |
| Pea gravel | Rake level, top up annually | N/A | Scatter under foot traffic, weed pressure |
| Decomposed granite | Rake, top up, control weeds | N/A | Muddy when wet (use stabilizer), weed growth |
Cost Breakdown — DIY vs Professional
| Material | DIY Materials (16 ft dia. / ~200 sq ft) | Installed by Pro |
|---|---|---|
| Concrete pavers | $600–$1,600 (pavers + base + edging) | $2,200–$5,000 |
| Natural flagstone | $800–$2,400 | $2,800–$6,500 |
| Clay brick | $600–$1,400 | $2,000–$4,500 |
| Pea gravel | $200–$600 (gravel + fabric + edging) | $600–$1,400 |
| Decomposed granite | $200–$500 | $500–$1,200 |
DIY labor savings on a 200 sq ft paver patio typically run $1,000–$2,500 compared to professional installation. The work is physically demanding (excavation, compaction) but requires no specialized equipment beyond a plate compactor rental ($70–$120/day) and basic hand tools.
Frequently Asked Questions
What is the best paving material for a fire pit area?
Concrete pavers and natural flagstone are the top choices — both offer excellent heat resistance, good DIY-ability, and lasting durability. Brick is a close third. Gravel and decomposed granite are the best budget options with no base prep beyond excavation.
How far should paving extend around a fire pit?
At least 7 feet from the fire pit center in all directions — creating a 14-foot minimum diameter paved area. For comfortable seating, 10 feet from center (20-foot diameter) is ideal. Keep the fire pit at least 10 feet from any structure.
Can you use asphalt around a fire pit?
No. Asphalt is petroleum-based and should never be used within 10 feet of an open flame — it softens under heat and poses a fire risk. If you have an existing asphalt driveway nearby, install a non-combustible paver apron between the asphalt and the fire pit area.
How deep should the base be?
4–6 inches of compacted crushed gravel plus 1 inch of sand bedding, totaling 5–7 inches of base below the pavers. In freeze-thaw climates, use the full 6-inch gravel base to prevent frost heave.
What materials should I avoid near a fire pit?
Asphalt, composite decking, pressure-treated lumber, rubber pavers, and thin polished tile. All pose heat, fire, or structural safety risks within 10 feet of an open flame.
Do I need to seal pavers around a fire pit?
Optional but beneficial for concrete pavers — a penetrating sealer protects against soot staining every 2–3 years. Avoid sealing the area within 18–24 inches of the fire bowl where radiant heat can degrade sealer. Natural stone generally doesn't require sealing.
What pattern should I use?
Running bond is the simplest for beginners. Herringbone gives the best structural interlock. Circular fan radiating from the fire pit center is the classic premium look. A contrasting border ring on any pattern adds a professional finished appearance.
How much does it cost to pave around a fire pit?
DIY materials for a 16-foot diameter area: $200–$2,400 depending on material (gravel being cheapest, flagstone most expensive). Professional installation of the same area: $600–$6,500. Concrete pavers hit the best sweet spot of cost, durability, and DIY-ability.
Related Guides
References: Interlocking Concrete Pavement Institute (ICPI) · National Fire Protection Association (NFPA) · Fire Pit Safety Guidelines