Asphalt Millings Driveway — Cost, Pros & Cons, and How to Install (2026)
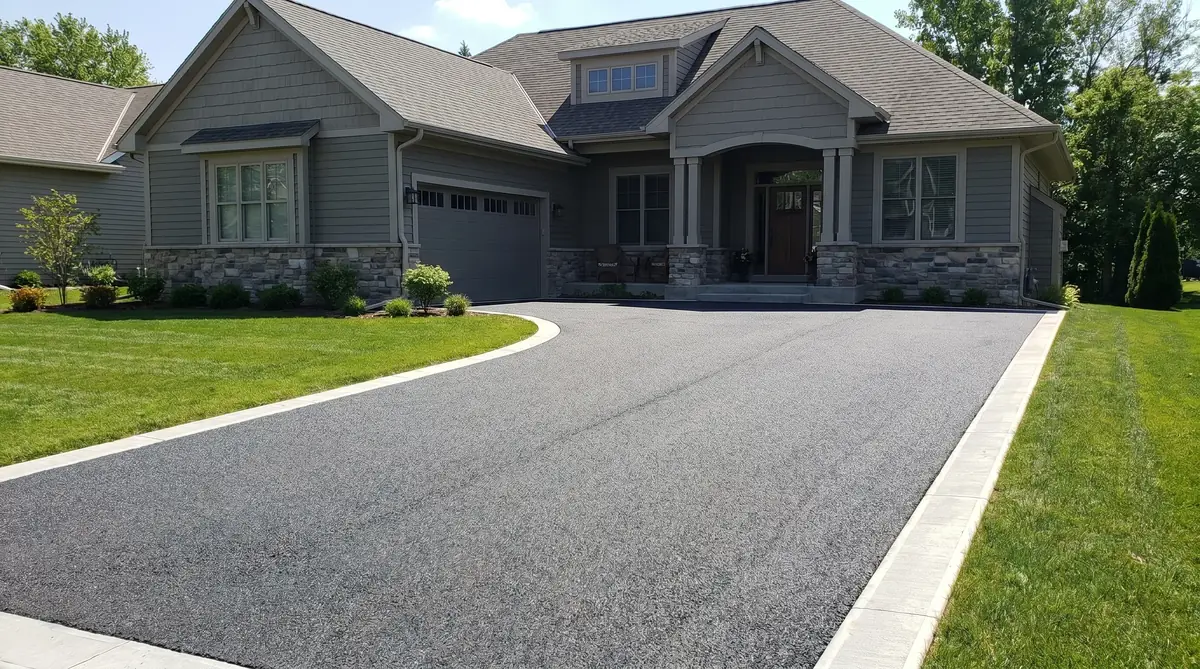
An asphalt millings driveway gives you a dark, durable surface at 50–75% of the cost of new asphalt. Millings — also called recycled asphalt pavement (RAP) — are the ground-up remnants of old roads and parking lots. When properly laid and compacted, they re-bind in warm weather to form a semi-solid surface that handles vehicle traffic for decades with very little maintenance.
This guide covers everything: what asphalt millings are, whether they're right for your driveway, exactly how to install them, how thick to apply them, how much the whole project costs, and how they compare to gravel and new asphalt. Use our Asphalt Millings Calculator to estimate how many tons you need.
In this guide
What Are Asphalt Millings?
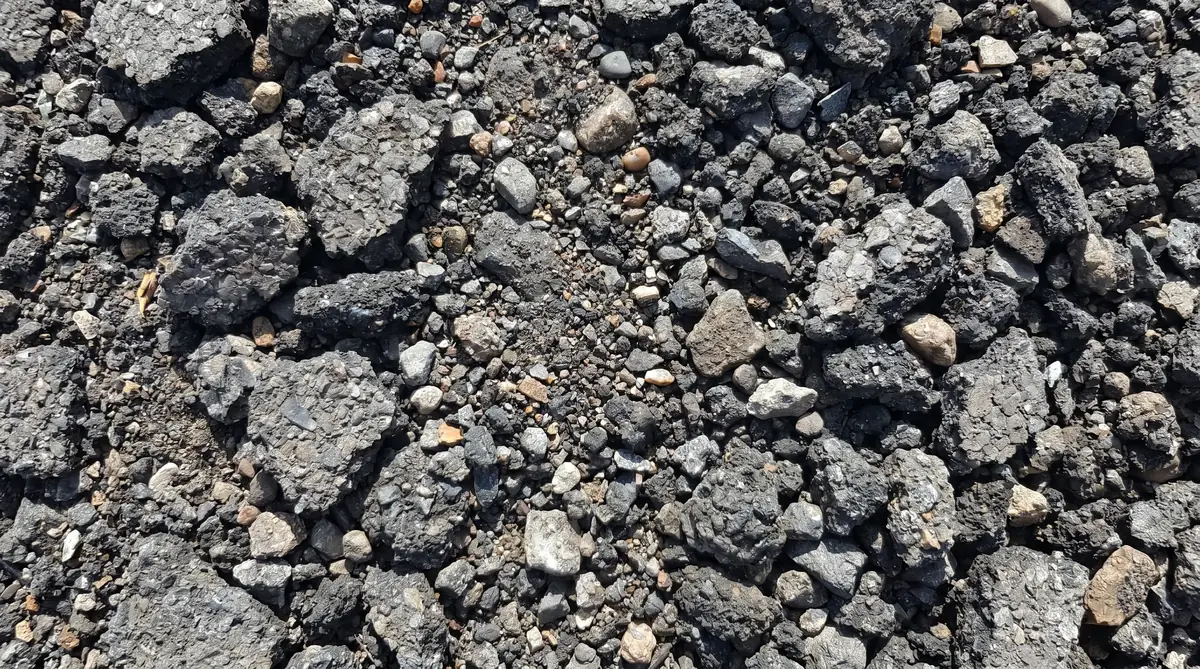
When a road or parking lot is resurfaced, the old asphalt is ground up by a cold planer (milling machine) rather than hauled to a landfill. The result is a coarse, dark gray aggregate that still contains residual asphalt binder — the material that made the original pavement sticky and durable. This is recycled asphalt pavement, or RAP.
Millings look similar to coarse gravel but are darker and slightly oily to the touch. Particle sizes range from fine dust up to about 1 inch in diameter, depending on how finely the milling machine was set. The mix of particle sizes is what makes millings compact so effectively — fine particles fill the voids between larger ones and lock everything together under pressure.
Pros and Cons of Asphalt Millings Driveways
Advantages
- Cost: 50–75% cheaper than new hot mix asphalt. Material often costs $7–$25/ton vs $80–$150/ton for new asphalt.
- Self-binding surface: Residual binder re-activates in warm weather, gradually hardening the surface and suppressing dust far better than plain gravel.
- Eco-friendly: Keeps millions of tons of old asphalt out of landfills. One of the most recycled materials in the construction industry.
- No permits needed: Most jurisdictions treat millings like gravel — no impervious surface permit required.
- DIY-friendly: Can be installed with a rented plate compactor and skid steer, unlike hot mix asphalt which requires specialized paving equipment.
- Good drainage: Before full binding occurs, millings allow water to percolate through, reducing runoff.
- Easy repairs: Add a bag of cold-patch or a few shovels of fresh millings to a low spot and compact — done.
Disadvantages
- Appearance: Rougher texture than new asphalt and variable color. Not suitable for upscale curb appeal.
- Tracking in heat: On very hot days (above 90–95°F), the surface can soften slightly and track onto shoes or into the garage.
- Not as hard as new asphalt: Vehicles with narrow tires (motorcycles, bicycles) can leave marks in fresh millings before the surface fully sets.
- Availability varies: Supply depends on local road resurfacing projects. Some areas have abundant cheap millings; others have limited supply.
- Requires compaction: Loose millings that are not properly compacted will rut, shift, and erode. Compaction is non-negotiable.
Cost of an Asphalt Millings Driveway (2026)
Asphalt millings are significantly cheaper than new asphalt at every stage — material, delivery, and installation. Here is a full cost breakdown for a standard 600 sq ft driveway at 4 inches thick:
| Cost Item | DIY | Contractor-Installed |
|---|---|---|
| Millings material (12–14 tons) | $100–$350 | $100–$350 |
| Delivery (per load) | $80–$200 | included |
| Plate compactor rental (1 day) | $80–$150 | — |
| Grading & spreading labor | $0 (DIY) | $200–$500 |
| Gravel base (if needed) | $150–$400 | $150–$400 |
| Total — 600 sq ft driveway | $410–$1,100 | $600–$1,500 |
| Cost per square foot | $0.68–$1.83 | $1.00–$2.50 |
Compare that to a new asphalt driveway: $2,400–$4,200 for the same 600 sq ft. Millings cost 60–75% less installed. Use our Asphalt Millings Calculator to get a precise tonnage and cost estimate for your specific driveway dimensions.
Free millings tip: Contact your county road department or local paving contractors. Many offer millings free or at minimal cost ($5–$10/ton) if you haul them yourself. A pickup truck can carry about 1 ton per trip.
How Thick Should Asphalt Millings Be?
Thickness is the most critical variable in a millings driveway. Too thin and the surface ruts and shifts under traffic; too thick on soft soil causes instability and uneven settling.
| Application | Millings Depth | Gravel Base | Notes |
|---|---|---|---|
| Residential driveway (firm soil) | 4 inches compacted | Optional | Apply in 2 lifts of 2 in each |
| Residential driveway (clay/soft soil) | 4–6 inches | 4 inches required | Base prevents sinking |
| Commercial / heavy truck traffic | 6 inches | 6 inches required | Professional grading recommended |
| Parking area (cars only) | 3–4 inches | Optional | Compact in 2 inch lifts |
| Pathway / low traffic | 2–3 inches | Optional | Plate compactor sufficient |
The Two-Lift Rule
Never dump all your millings at once and compact once. Apply in two lifts — first layer 2–3 inches, compact thoroughly, then second layer 2–3 inches, compact again. Two thin lifts compact far more densely than one thick layer, and a denser surface is a harder, longer-lasting surface.
How to Install Asphalt Millings on a Driveway

Installing an asphalt millings driveway is a realistic DIY project for most homeowners with access to a skid steer or tractor for spreading and a rented plate compactor. Here is the complete process:
-
Mark and excavate
Mark your driveway boundary with stakes and string. Excavate 6–8 inches of soil to allow for a base layer (if needed) plus 4–6 inches of millings. For firm, well-drained soil, 4–5 inches of excavation may be sufficient. -
Install gravel base (if needed)
On soft, clay-heavy, or poorly drained soil, lay 4 inches of compacted Class 5 crushed stone before the millings go down. Skip this on firm, sandy, or gravelly native soil. The base prevents the millings from sinking during wet weather. -
Grade and crown the subbase
Shape the subbase with a slight crown — higher in the center than the edges — so water sheds to the sides. Aim for a 2–4% cross-slope (about ¼ inch per foot). Poor drainage is the #1 reason millings driveways fail prematurely. -
Spread first lift of millings (2–3 inches loose)
Dump and spread millings with a skid steer, tractor blade, or by hand for small areas. Spread loose millings 2–3 inches deep across the full width. Keep the crowning consistent throughout. -
Compact first lift
Make 3–4 passes with a vibratory plate compactor or a roller, starting at the edges and working toward the center. The millings should compress by about 20–25%. Do not skip this step — loose millings rut immediately under traffic. -
Spread second lift (2–3 inches loose)
Add the second layer of millings on top of the compacted first lift. Keep thickness consistent. This is your finished surface layer, so grade it carefully for a smooth, even appearance. -
Compact second lift
Make 4–5 passes with the compactor, working edges first then the middle. The final surface should feel firm with minimal give underfoot. -
Install edging (recommended)
Plastic or steel driveway edging along both sides keeps millings from spreading laterally into the yard. Without edging, millings slowly migrate off the edges and the driveway narrows over time. -
Allow to cure before heavy use
Let the driveway sit for 24–48 hours before normal vehicle traffic. Avoid sharp turns and standing vehicles during the first week while the surface consolidates. In warm weather, the binding will accelerate.
Asphalt Millings vs Gravel vs New Asphalt
| Feature | Asphalt Millings | Gravel | New Asphalt |
|---|---|---|---|
| Installed cost (600 sq ft) | $600–$1,500 | $400–$1,200 | $2,400–$4,200 |
| Appearance | Dark gray, semi-solid | Light tan/gray, loose | Smooth black |
| Dust suppression | Excellent | Poor | Excellent |
| Maintenance | Low | Medium (top-dress yearly) | Low-medium (seal every 3 yrs) |
| Lifespan | 20–30 years | Indefinite (with top-dressing) | 15–25 years |
| Hardens over time | Yes | No | N/A (already hard) |
| DIY-friendly | Yes | Yes | No |
| Permits typically needed | No | No | Sometimes |
| Best for | Budget driveways, rural roads | Long rural driveways | Suburban driveways, curb appeal |
Bottom line: If cost is your priority and you want a dark, mostly dust-free surface without the complexity of hot mix asphalt, millings are the best value option. If curb appeal matters or you live in a HOA neighborhood, new asphalt or concrete will serve you better. For a full comparison with new asphalt, see our cost to replace asphalt driveway guide.
Maintaining an Asphalt Millings Driveway
One of the biggest advantages of millings is how little maintenance they require compared to other driveway surfaces:
- Year 1–2: Avoid heavy raking or leaf blowing that displaces loose surface material before binding is complete. Drive normally — vehicle tires actually help compact and bind the surface.
- Ruts and low spots: Fill immediately with fresh millings or cold-patch asphalt and compact. Small repairs take 15 minutes.
- Edge migration: Check edges each spring and push any spread material back toward center. Re-compact if needed.
- Weed growth: Apply a driveway-rated herbicide pre-emergent in spring if weeds push through. A well-compacted surface suppresses most weed growth on its own.
- Re-topping after 5–10 years: Apply 1–2 inches of fresh millings and compact to restore surface. Far cheaper than replacing a gravel or asphalt driveway.
- Sealcoating: Optional — some homeowners apply a diluted asphalt driveway sealer after 2–3 years to lock the surface and improve appearance. Not required but extends binding life.
Avoid these mistakes
- Spreading millings without compacting — they will rut within weeks
- Applying in one thick lift instead of two thin lifts — deeper material never compacts fully
- Skipping edging — millings spread laterally over time without containment
- Ignoring drainage — water pooling under millings causes soft spots and heaving
Frequently Asked Questions
Are asphalt millings good for a driveway?
Yes — for the right situation. Millings are excellent for rural and suburban driveways where budget matters more than aesthetics. They compact into a dark, semi-solid surface, suppress dust far better than gravel, and can last 20–30 years with minimal maintenance. The trade-offs are a rougher finish and slight softening on extremely hot days.
How many tons of asphalt millings do I need?
For a standard 12×50 ft driveway (600 sq ft) at 4 inches thick: 600 × (4÷12) = 200 cubic feet ÷ 27 = 7.4 cubic yards × 1.6 tons/yd³ = 11.8 tons. Add 15% compaction factor = order 13.5 tons. Use our millings calculator for any size project.
How long do asphalt millings last on a driveway?
A properly installed millings driveway lasts 20–30 years. The surface gradually hardens over the first 2–3 summers as the residual binder re-bonds. Periodic top-dressing with fresh millings (every 8–10 years) keeps the surface looking fresh and adds decades of life at minimal cost.
Do asphalt millings need to be sealed?
No — sealing millings is optional. The material self-binds naturally. Some homeowners apply a diluted asphalt emulsion sealer after 2–3 years to speed up surface hardening and improve appearance, but it is not necessary for durability.
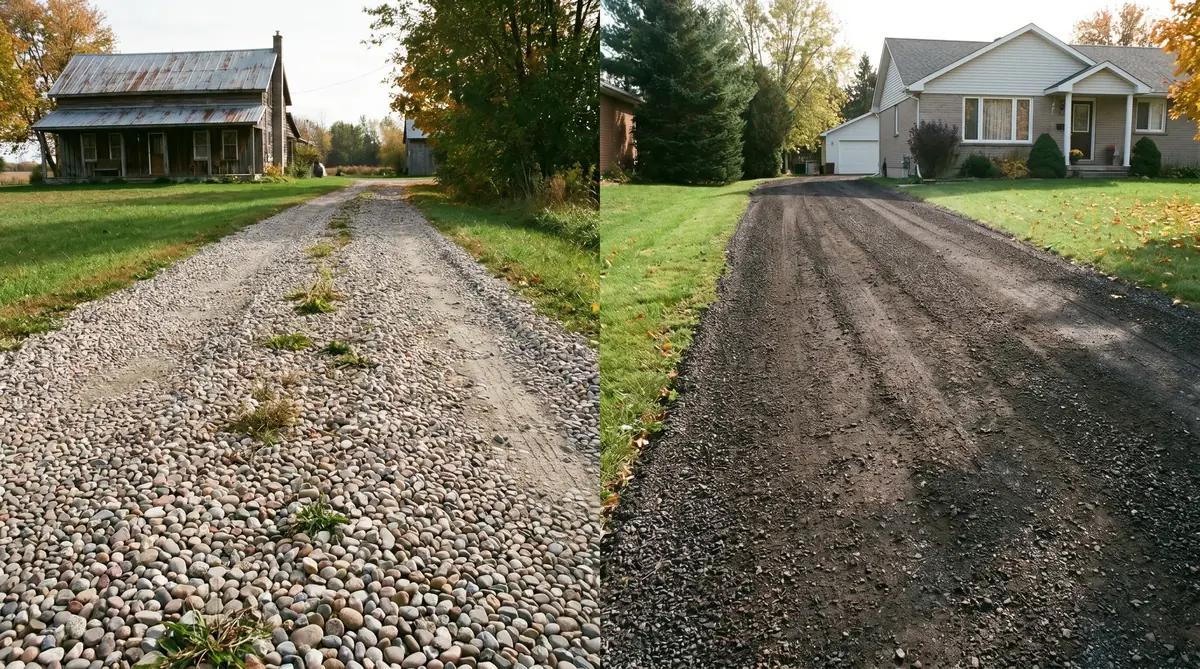
Can I put asphalt millings over an existing gravel driveway?
Yes, this is one of the most common applications. Rake the gravel as flat as possible, add 3–4 inches of millings on top, and compact in two lifts. The millings will work their way into the gravel and lock together for a stable base.