Asphalt Driveway Sealer — Best Products, Cost & How to Apply (2026)
A quality asphalt driveway sealer is the single most cost-effective maintenance investment you can make. For $40–$85 in materials and an afternoon of work, sealing extends your driveway's life by 5–10 years and keeps it looking freshly paved. Skip it, and you're looking at resurfacing costs of $3–$7 per square foot or a full replacement at $7–$15 per square foot — all because UV rays, water, and freeze-thaw cycles quietly destroyed the asphalt binder underneath.
The problem is the market is flooded with products, and the wrong choice — wrong sealer type for your climate, wrong application temperature, over-sealing — causes more damage than doing nothing at all. This guide cuts through the noise: here's exactly what type of asphalt driveway sealant to buy, when to apply it, and how to do it right the first time. If you're ready to compare specific brands and product picks, see our dedicated best asphalt sealer for driveways guide.
Quick answer: For most US homeowners, a water-based asphalt emulsion sealer with 50%+ solids is the right choice. It's legal in all 50 states, bonds perfectly with existing asphalt, and lasts 2–4 years per application. Use our free sealcoating calculator to find out exactly how much you need and what it will cost.
Table of Contents
- Types of Asphalt Driveway Sealer Compared
- When Does Your Driveway Actually Need Sealing?
- How Much Does Asphalt Driveway Sealant Cost?
- How to Apply Asphalt Driveway Sealer (Step-by-Step)
- How Often Should You Reseal?
- 5 Mistakes That Ruin a Sealcoating Job
- DIY vs. Professional Sealcoating
- Frequently Asked Questions
Types of Asphalt Driveway Sealer — Full Comparison
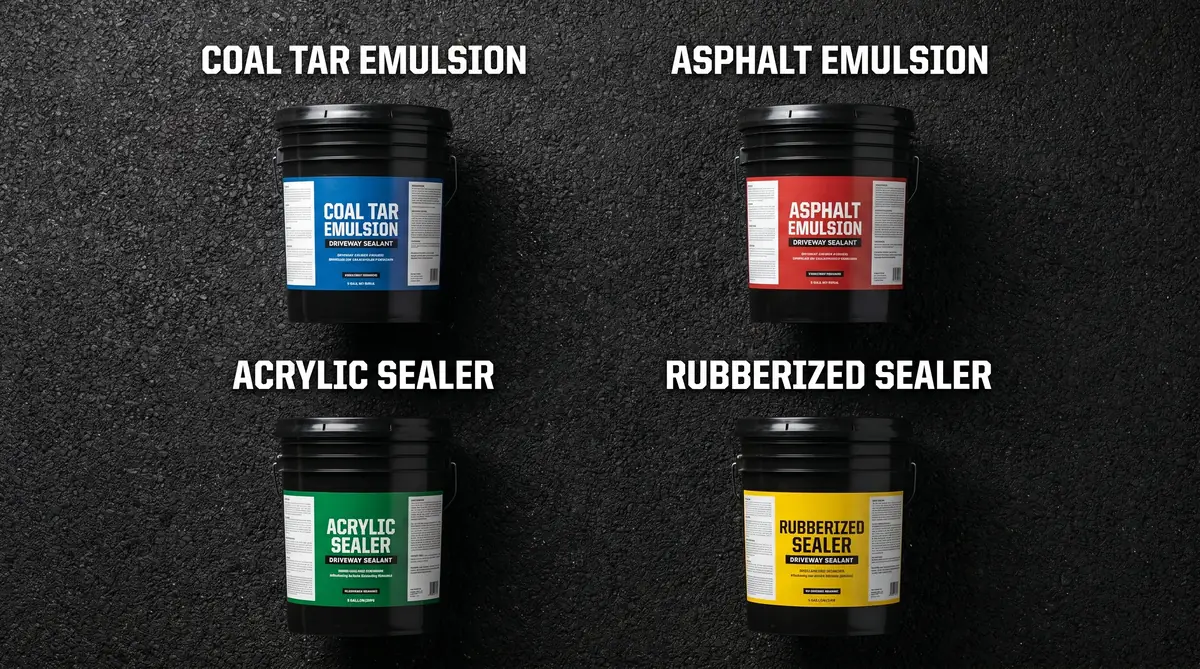
There are four main types of asphalt driveway sealant on the market. They are not interchangeable — each has different chemistry, performance characteristics, and legal status depending on where you live.
| Sealer Type | Cost/Sqft (DIY) | Durability | Dry Time | Best For | Restrictions |
|---|---|---|---|---|---|
| Asphalt Emulsion | $0.06–$0.14 | 2–4 years | 24–48 hrs | Most homeowners, all climates | ✅ Legal everywhere |
| Coal Tar Emulsion | $0.08–$0.18 | 3–5 years | 24–48 hrs | High-traffic, fuel spills | ⚠️ Banned in MN, WI, DC + cities |
| Acrylic Sealer | $0.10–$0.20 | 2–3 years | 4–8 hrs | New driveways, curb appeal | ✅ Legal everywhere |
| Rubberized / Fast-Dry | $0.18–$0.30 | 3–4 years | 2–4 hrs | Commercial, quick reopening | ✅ Legal everywhere |
Asphalt Emulsion Sealer — The Everyday Choice
Made from the same petroleum base as your driveway, asphalt emulsion sealer bonds chemically with existing asphalt rather than sitting on top of it. That compatibility makes it the most forgiving option for homeowners — it adheres well even on surfaces that aren't perfectly clean, fills minor surface pores, and produces a consistent matte-black finish. Look for products labeled at least 50% solids; budget products at 30–35% solids wear down in a single season. Popular brands include Gardner, Henry, and SealMaster.
Coal Tar Emulsion — The Longest-Lasting Option
Coal tar comes from coal processing, not petroleum, which makes it exceptionally resistant to gasoline, motor oil, and jet fuel — it's why airport tarmacs and commercial fueling stations use it. On a residential driveway, that chemical resistance means a single application lasts 3–5 years versus 2–4 for emulsion. The downsides: strong odor during application, a 48-hour cure period where children and pets need to stay off, and a growing list of municipalities that have banned it due to polycyclic aromatic hydrocarbon (PAH) runoff. Always check local regulations before purchasing coal tar products.
Acrylic Sealer — Best Finish, Fastest Dry
Fully water-based and odor-free, acrylic sealers dry in as little as 4 hours and produce the deepest jet-black finish of any sealer type. They're the right call for driveways under 5 years old in good condition — the clean surface allows the acrylic to bond and look its best. On an older, oxidized, or rough driveway, acrylic won't penetrate or fill pores effectively and tends to peel within a season. Don't use acrylic as a fix for a deteriorating surface — it isn't one.
Rubberized / Fast-Dry Sealer
These are professional-grade products that incorporate rubber polymers for added flexibility and crack resistance. They cost roughly twice as much as standard emulsion but can tolerate minor driveway movement without cracking, and you can reopen the driveway in 2–4 hours. Mainly used on commercial driveways, parking lots, and driveways in extreme climates with significant freeze-thaw movement. For standard residential use, the premium typically isn't worth the added cost unless you've had repeated issues with sealer cracking.
When Does Your Driveway Actually Need Sealing?
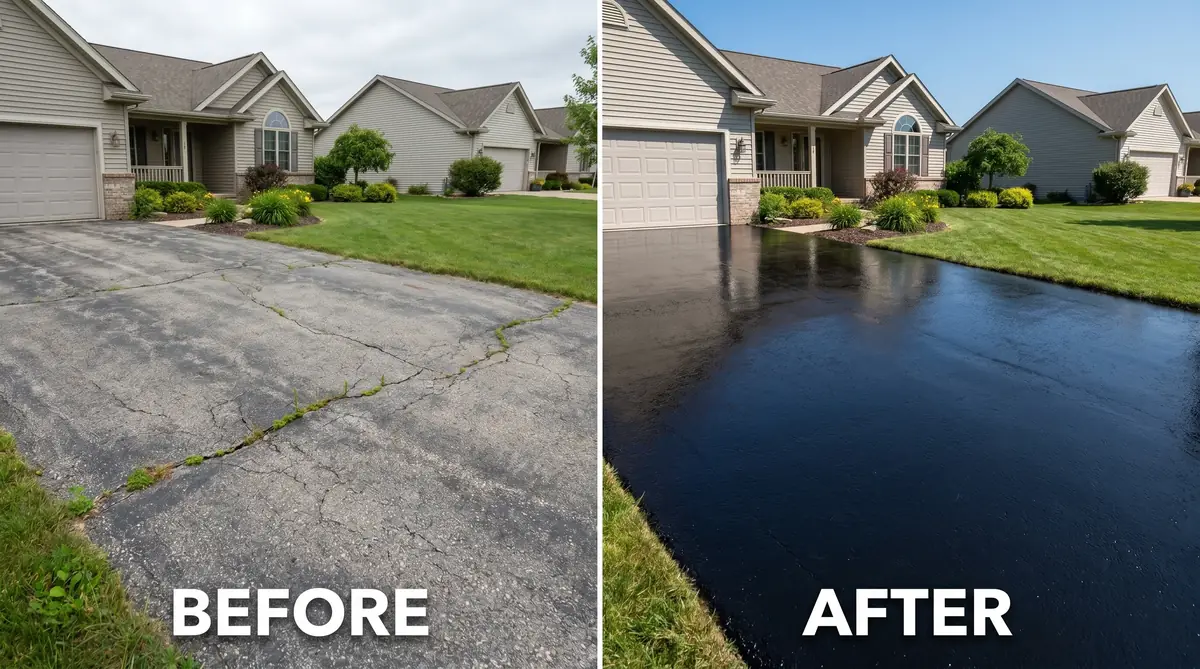
Three questions tell you whether it's time to seal. Stand at the end of your driveway and honestly evaluate:
- Has it faded from black to gray? UV oxidation is degrading the asphalt binder. Sealing now slows the damage — waiting accelerates it.
- Does water soak in instead of beading? Pour a small cup of water on the surface. If it beads and rolls off, the sealer is still doing its job. If it soaks in immediately, the surface is unprotected.
- Does it feel rough and sandy? Surface aggregate loosening is a sign the binder has deteriorated. A fresh coat of asphalt driveway sealant restores the binding layer before you lose stones.
Two situations where you should not seal: brand-new driveways (wait 6–12 months for curing), and driveways with structural cracks wider than 1 inch or significant base failure. Sealer is a surface treatment — it cannot fix a failing base. If your driveway has large alligator cracks, heaving, or potholes, read our driveway resurfacing guide first to determine whether sealing makes sense or resurfacing is the right call.
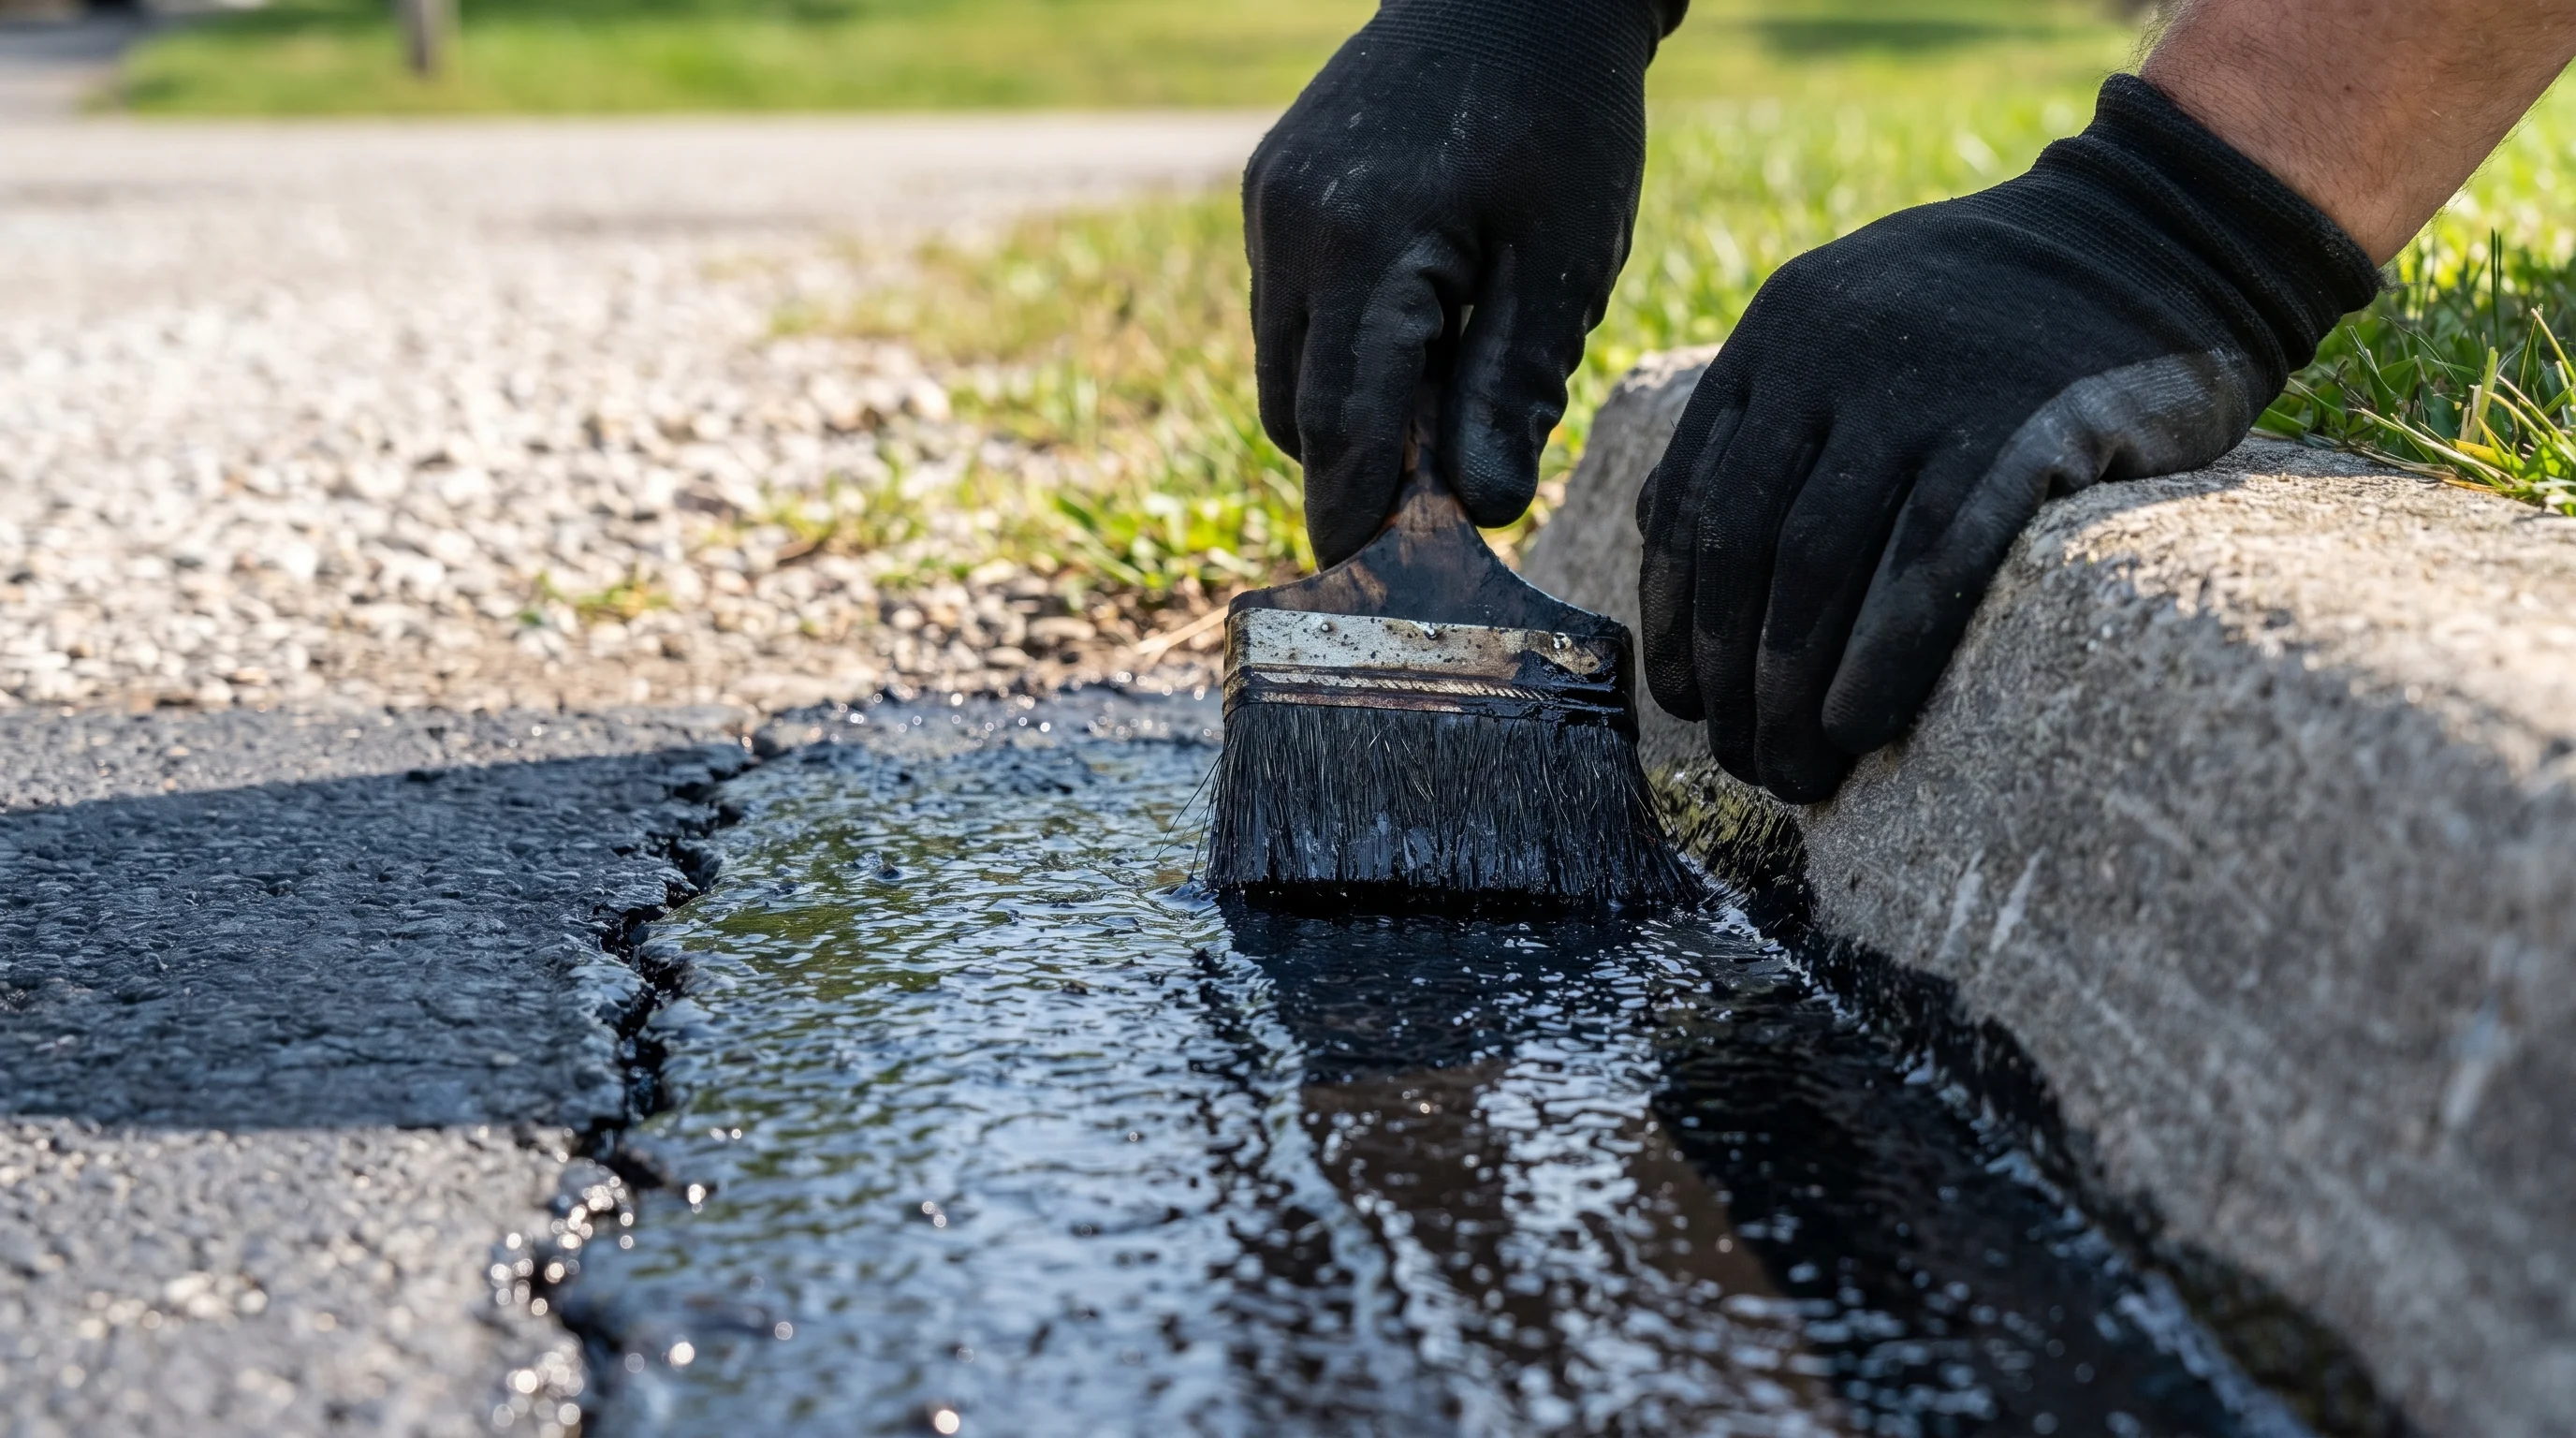
⚠️ Fill Cracks Before You Seal — Every Time
Apply asphalt crack filler to any crack wider than 1/4 inch and let it cure for 24 hours before sealing. Sealing over open cracks traps moisture underneath. When that moisture freezes in winter, it expands and widens the crack dramatically. Our free crack fill calculator tells you exactly how much filler you need for your driveway.
How Much Does Asphalt Driveway Sealant Cost?
The cost of asphalt driveway sealant depends on whether you DIY or hire a contractor, the size of your driveway, and which product you choose. Here's what to expect:
| Driveway Size | DIY Materials | Professional (Standard) | Professional (Premium) |
|---|---|---|---|
| 400 sqft | $25–$55 | $55–$80 | $80–$120 |
| 600 sqft (avg) | $36–$84 | $85–$120 | $120–$180 |
| 800 sqft | $50–$110 | $110–$160 | $160–$240 |
| 1,000 sqft | $60–$140 | $140–$200 | $200–$300 |
| 1,500 sqft | $90–$210 | $210–$300 | $300–$450 |
For a precise number based on your driveway's exact dimensions and your local labor rates, use our driveway sealing cost calculator. It factors in sealer type, surface condition, and whether you're comparing DIY versus hiring a sealcoating contractor.
A few cost factors that catch homeowners off guard: cleaning and prep work (pressure washing, degreasing oil stains) is not included in most contractor quotes and can add $30–$75. Crack filling is also typically billed separately — usually $1–$3 per linear foot. Get itemized quotes so you know what's actually included. See the full breakdown in our sealcoating cost DIY vs professional guide.
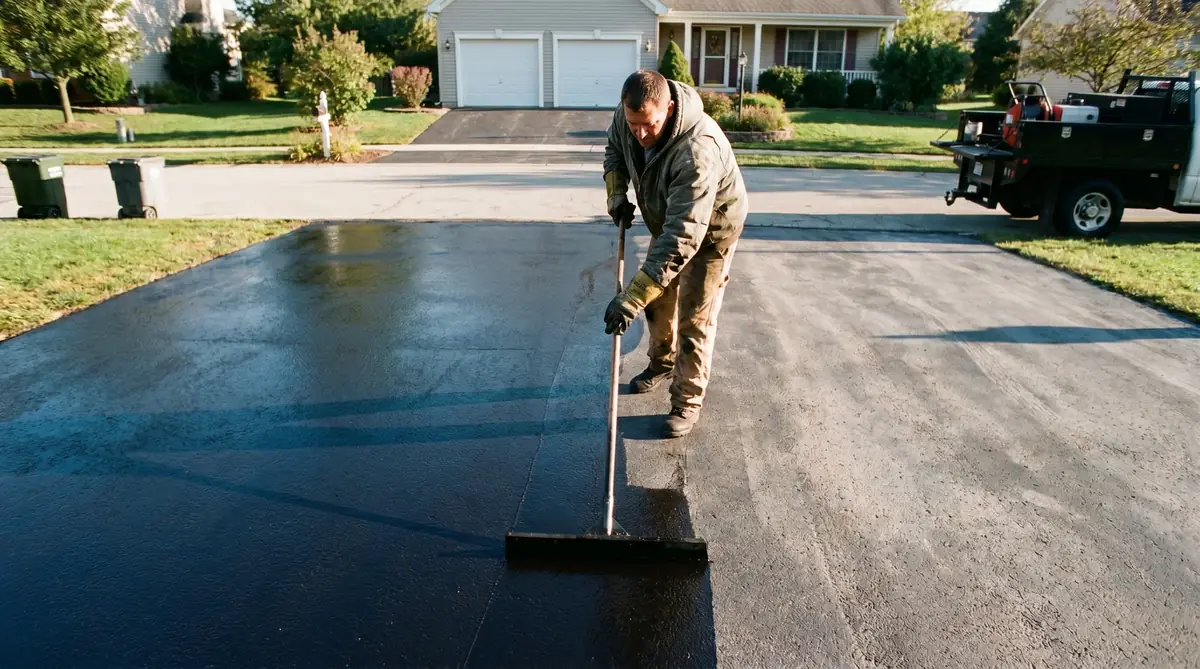
How to Apply Asphalt Driveway Sealer (Step-by-Step)
Applying asphalt driveway sealer yourself is straightforward if you respect the prep work. Most failed DIY sealcoating jobs fail at prep, not application. Give yourself a full day and don't rush the drying steps.
What you'll need: long-handled squeegee or brush applicator, stiff broom, garden hose or pressure washer, asphalt degreaser, asphalt crack filler, painter's tape, and your chosen sealant product (2 buckets minimum for a 600 sqft driveway).
- Check the forecast. You need at least 48 hours of dry weather, with temperatures staying above 50°F day and night throughout the curing period. Applying sealer before rain ruins the entire job — the sealer washes away before it bonds.
- Clean the surface thoroughly. Sweep out all debris with a stiff broom, then rinse with a garden hose or pressure washer. Any oil or fuel stains must be treated with an asphalt degreaser — standard sealer will not bond over oil. Let the surface dry completely (minimum 24 hours after washing).
- Fill all cracks. Use a quality asphalt crack filler in any crack wider than 1/4 inch. Overfill slightly, let it cure for 24 hours, then trim any proud material flush with a putty knife. Don't skip this — it's the most important prep step.
- Protect edges and borders. Run painter's tape along garage doors, concrete curbs, and any surfaces you don't want stained. Asphalt driveway sealant is very difficult to remove from concrete and masonry once it cures.
- Stir the sealer thoroughly. Sealant settles in the bucket during shipping and storage. Use a stir stick for 3–5 minutes until the consistency is completely uniform. Poorly mixed sealer produces an uneven, streaky finish.
- Apply the first coat. Pour a thin ribbon of sealer across the top of the driveway and spread it down using your squeegee in smooth, consistent strokes. Work from the top down toward the street. Keep a wet edge and don't let the sealer dry between passes. The first coat should be thin — you're not trying to fill everything in one pass.
- Let the first coat cure. Wait 24 hours minimum (longer in humid conditions or if using coal tar). The surface should feel completely dry and non-tacky before the second coat goes on.
- Apply the second coat perpendicular to the first. Cross-hatching the second coat in the opposite direction fills any thin spots and ensures consistent coverage. This coat should also be thin. Keep all traffic off the sealed surface for 24–48 hours total after the second coat.
✅ Pro Tip: Apply in the Shade
If you can, time your application to work in the shade or on an overcast day. Direct summer sun heats the pavement surface above 100°F, causing the sealer to dry too fast and leave lap marks at every stroke overlap. Early morning or a cloudy day gives you more working time and a smoother result.
How Often Should You Reseal Your Driveway?
The correct schedule for asphalt driveway sealer is every 2–3 years, depending on your climate and driveway traffic. Specifically:
- Northern states (MN, WI, MI, NY, PA): every 2 years — harsh freeze-thaw cycles accelerate sealer breakdown
- Mid-Atlantic and Southeast: every 2–3 years — moderate climate, moderate traffic
- Southwest and Gulf Coast: every 3 years — intense UV but minimal freeze-thaw stress
- High-traffic driveways (multiple daily vehicles, delivery trucks): every 18–24 months
One of the most damaging things you can do is seal annually. That creates a thick, layered buildup that becomes brittle, flakes off in sheets, and looks far worse than a natural unsealed surface. The sealer never fully cures between applications, and the bottom layers stay soft and unstable indefinitely. If a contractor tells you to seal every year, find another contractor.
Want to know when your specific driveway was last sealed and whether it's due? Check our driveway cost guide for typical maintenance schedules by region and driveway age.
5 Mistakes That Ruin a Sealcoating Job
Most sealcoating failures come down to one of these five errors. Each one is preventable:
- Sealing over unfilled cracks. The top mistake by a wide margin. The sealant bridges the crack visually but traps water underneath. The first hard freeze widens the crack by a factor of 2–3 and you're back to square one — except now there's a layer of flaking sealant on top too.
- Applying below 50°F. Below that threshold, the emulsifiers in water-based sealers don't activate properly. The sealer appears to dry but hasn't bonded. It will peel off in large sheets within weeks of the first freeze.
- One thick coat instead of two thin coats. A thick single coat stays wet on the bottom while curing on top. It cures unevenly, cracks prematurely, and never develops the hardness of two properly applied thin coats.
- Not cleaning oil stains first. Petroleum from engine oil, gasoline, or hydraulic fluid breaks the chemical bond between sealer and asphalt. The sealer just peels off the contaminated area. Always degrease first — standard soap and water isn't enough, use a dedicated asphalt degreaser.
- Sealing a new driveway too early. Fresh asphalt off-gasses oils for 6–12 months after installation. Sealing too early traps those oils underneath and softens the sealer permanently. Wait at least 6 months — a full year in hot climates — before the first application.
DIY vs. Professional Asphalt Driveway Sealer Application
Deciding whether to apply asphalt driveway sealant yourself or hire a contractor comes down to three factors: driveway size, surface condition, and how much your time is worth.
| DIY | Professional | |
|---|---|---|
| Best for | Driveways under 600 sqft in good condition | 600+ sqft, significant cracking, commercial |
| Cost (600 sqft) | $36–$84 in materials | $85–$180 installed |
| Time | 4–6 hours + 2 days curing | 1–2 hours on site |
| Equipment | Squeegee + broom | Commercial spray rig |
| Finish quality | Good with care | Very consistent, no lap marks |
| Crack filling | DIY (additional cost) | Often included or add-on |
For driveways over 600 sqft, professional spray application produces a noticeably more even finish, and the time savings are significant. A contractor's commercial spray rig covers a 1,000 sqft driveway in about 20 minutes per coat versus 2+ hours by hand. The cost premium over DIY materials is usually $60–$120 — often worth it for larger driveways where hand-applied lap marks will be visible from the street.
Use our driveway sealing cost calculator to compare the exact DIY vs professional numbers for your driveway size, or read the full breakdown in our sealcoating cost comparison guide.
Related Calculators & Tools
Plan your sealcoating project with precision:
Related Guides
Frequently Asked Questions
What is the best asphalt driveway sealer?
For most homeowners: an asphalt emulsion sealer with 50%+ solid content. Legal in all 50 states, bonds naturally with existing asphalt, and lasts 2–4 years. If coal tar is legal in your state and your driveway sees heavy traffic or frequent fuel drips, coal tar emulsion offers better protection at 3–5 years. Acrylic sealers are the best choice for driveways under 5 years old where appearance is the priority.
How much does asphalt driveway sealant cost?
DIY materials run $0.06–$0.14 per square foot — about $36–$84 for a 600 sqft driveway. A 5-gallon bucket costs $25–$35 and covers approximately 250–300 sqft per coat. Professional sealcoating costs $0.14–$0.30 per square foot installed, or $85–$180 for a 600 sqft driveway. Use our driveway sealing cost calculator for your exact dimensions.
How often should I apply asphalt driveway sealer?
Every 2–3 years. In northern states with harsh winters, every 2 years. In mild southern climates, every 3 years. Never seal more than once per year — annual applications create a brittle buildup layer that flakes and peels. The sealer needs 2 full years to properly cure and wear before re-application.
What temperature do I need to apply asphalt driveway sealant?
Minimum 50°F and rising, with no rain forecast for 48 hours. Both the air temperature and the pavement surface must be above 50°F throughout the application and curing period. Applying in cold conditions prevents the emulsifiers from activating — the sealer will appear to dry but won't bond and will peel off in sheets.
Do I need to fill cracks before sealing?
Yes — always. Fill any crack wider than 1/4 inch with asphalt crack filler and let it cure for 24 hours before sealing. Sealing over open cracks traps moisture that freezes and expands in winter, turning a 1/4-inch crack into a 3/4-inch crack. It's the most common and most preventable cause of sealcoating failure.
How long does asphalt driveway sealer take to dry?
Asphalt emulsion and coal tar sealers are dry to the touch in 4–8 hours but take 24–48 hours to fully cure before vehicle traffic. Acrylic sealers dry faster — typically 4 hours before foot traffic, 8 hours before vehicles. In humid conditions or low temperatures, add 50% to all drying times. When in doubt, wait longer.