Asphalt Crack Filling — How to Do It Right + Cost (2026 Guide)
Asphalt crack filling is the single most important maintenance task for any paved driveway or parking lot. A crack that's ¼ inch wide today becomes a pothole within 2–3 winters if left untreated. Water enters, freezes, expands, and breaks up the surrounding pavement — a process that costs $8–$25 per square foot to repair versus $0.50–$2.00 per linear foot to prevent with timely crack filling.
This guide covers everything about the asphalt crack filling process: how to identify which cracks need filling, the difference between filling and sealing, the best materials for DIY and professional use, a step-by-step repair process, 2026 cost data, and when it's time to call a contractor. Use our crack fill calculator to estimate how much material you need before buying.
In this guide
Types of Asphalt Cracks — Which Need Filling?
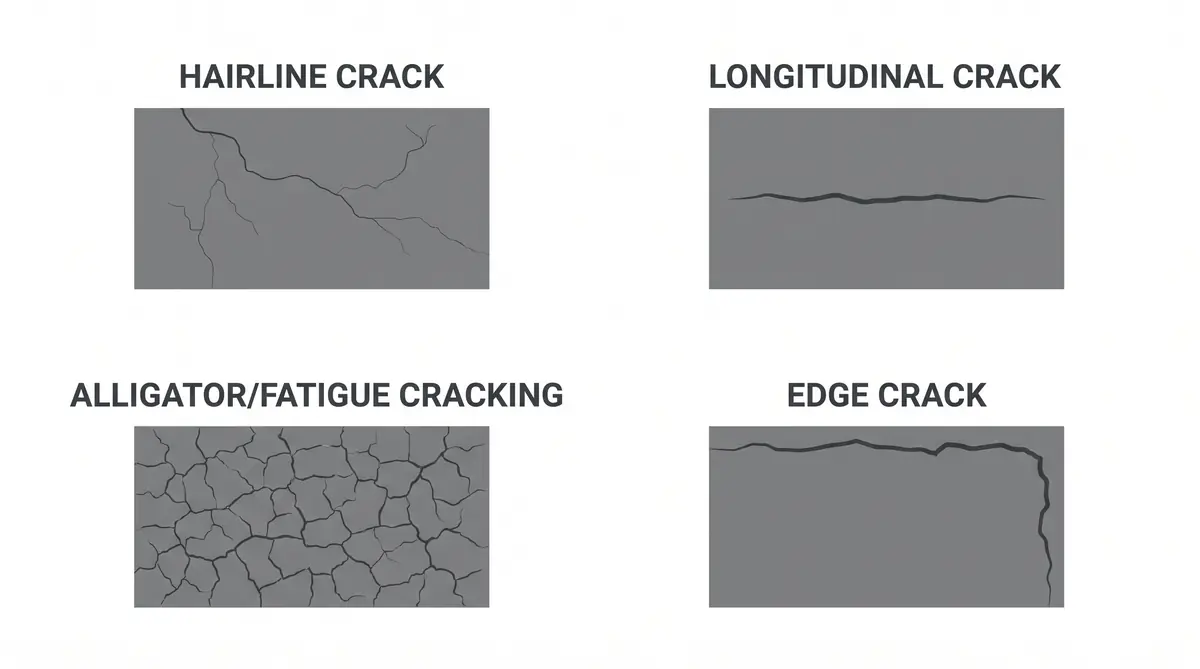
Not all asphalt cracks are created equal. Knowing which type you're dealing with determines whether crack filling is the right solution — or whether more extensive repair is needed.
Hairline Cracks (under ⅛ inch wide)
Very fine surface cracks that haven't penetrated deep into the asphalt layer. These are often caused by UV oxidation and surface aging. At this stage, sealcoating alone can slow progression. Crack filler is technically optional but applying a thin liquid crack sealer is inexpensive insurance.
Longitudinal & Transverse Cracks (⅛–1 inch wide)
These are the prime candidates for asphalt crack filling. Running parallel or perpendicular to the pavement direction, they're caused by thermal expansion and contraction, poor joint construction, or subbase movement. Fill these promptly — they allow water infiltration that accelerates damage exponentially.
Edge Cracks
Cracks along the driveway or road edge caused by lack of lateral support or poor drainage. Fill with crack filler and address the root cause — inadequate base support or poor drainage — otherwise they'll return. See our driveway installation guide for proper edge and base construction specs.
Alligator / Fatigue Cracking
A network of interconnected cracks resembling alligator skin. This is a structural failure — the base or subgrade has failed. Crack filling does not fix alligator cracking. The area needs to be saw-cut, removed, base rebuilt, and repaved. Applying filler to alligator cracking is a cosmetic patch that will fail within one season.
Potholes
Not a crack — potholes require patching, not filling. See our asphalt repair cost calculator for pothole repair cost estimates.
Rule of thumb: If you can insert a coin into the crack and it disappears — fill it now. If the surrounding asphalt is crumbling or the crack spans more than 1 square foot in a web pattern — that's alligator cracking and needs professional repair.
Crack Filling vs Crack Sealing — What's the Difference?
The terms are often used interchangeably but they refer to different processes:
| Feature | Crack Filling | Crack Sealing |
|---|---|---|
| Target crack width | ⅛ inch and wider | Any width |
| Material | Cold pour liquid, hot pour rubber | Hot rubberized sealant |
| Application | Poured or injected directly into crack | Applied in a band over the crack |
| Flexibility | Low to moderate | High — moves with pavement |
| Lifespan | 1–3 years (cold pour), 3–7 years (hot pour) | 5–10 years |
| Best for | DIY, smaller cracks | Professional use, active cracks |
| DIY-friendly | Yes | Requires specialized equipment |
For most homeowners, crack filling with a quality cold pour or hot pour product is the practical choice. Professional contractors use hot pour rubberized asphalt crack sealant applied with a melter-applicator for longer-lasting results on commercial or high-traffic surfaces. For a full comparison of filler products, see our asphalt crack filler products guide.
2026 Asphalt Crack Filling Cost
Cost varies by crack width, total linear footage, material type, and whether you DIY or hire a pro. Use our crack fill calculator to estimate material quantity and cost for your specific project.
| Method | Material | Cost per linear foot | Typical driveway (80 lin ft) |
|---|---|---|---|
| DIY — cold pour bottle | Cold pour liquid filler | $0.15–$0.40 | $12–$32 |
| DIY — cold pour cartridge | Cold pour caulk-style | $0.25–$0.60 | $20–$48 |
| DIY — hot pour kit | Hot rubberized filler | $0.50–$1.00 | $40–$80 |
| Professional — cold pour | Cold pour applied by crew | $0.50–$1.50 | $40–$120 |
| Professional — hot pour | Hot rubberized sealant | $1.00–$3.50 | $80–$280 |
| Professional — crack seal + sealcoat combo | Full service | $1.50–$4.00 | $120–$320 + sealcoat |
Most contractors have a minimum service charge of $150–$300 for residential crack filling jobs. If your driveway has only minor cracking, DIY is almost always more cost-effective. For driveways with extensive cracking or commercial lots, professional hot pour sealing delivers far better longevity per dollar. Estimate sealcoating cost alongside crack filling with our sealcoating calculator.
Best Materials for Asphalt Crack Filling
There are three main product categories for asphalt driveway crack filler:
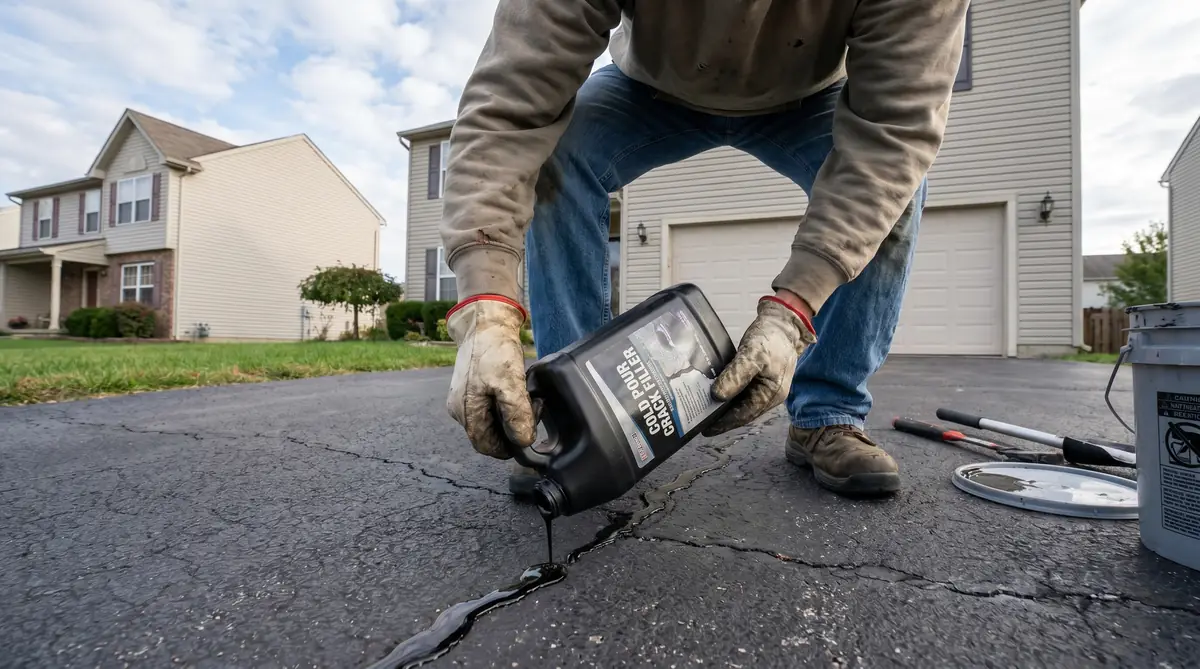
Cold Pour Liquid Crack Filler
Ready-to-use liquid filler in squeeze bottles or jugs. No heating required — pour directly into the crack. Best for cracks up to ½ inch wide. Easy cleanup, widely available at hardware stores. Lifespan: 1–3 years. Best for DIY homeowners. Price: $10–$25 per bottle (covers ~30–50 linear feet).
Cold Pour Cartridge (Caulk-style)
Applied with a standard caulk gun for more precise control. Excellent for narrow cracks (⅛–¼ inch). Neater finish than poured filler. Good adhesion to dry asphalt. Price: $8–$18 per cartridge.
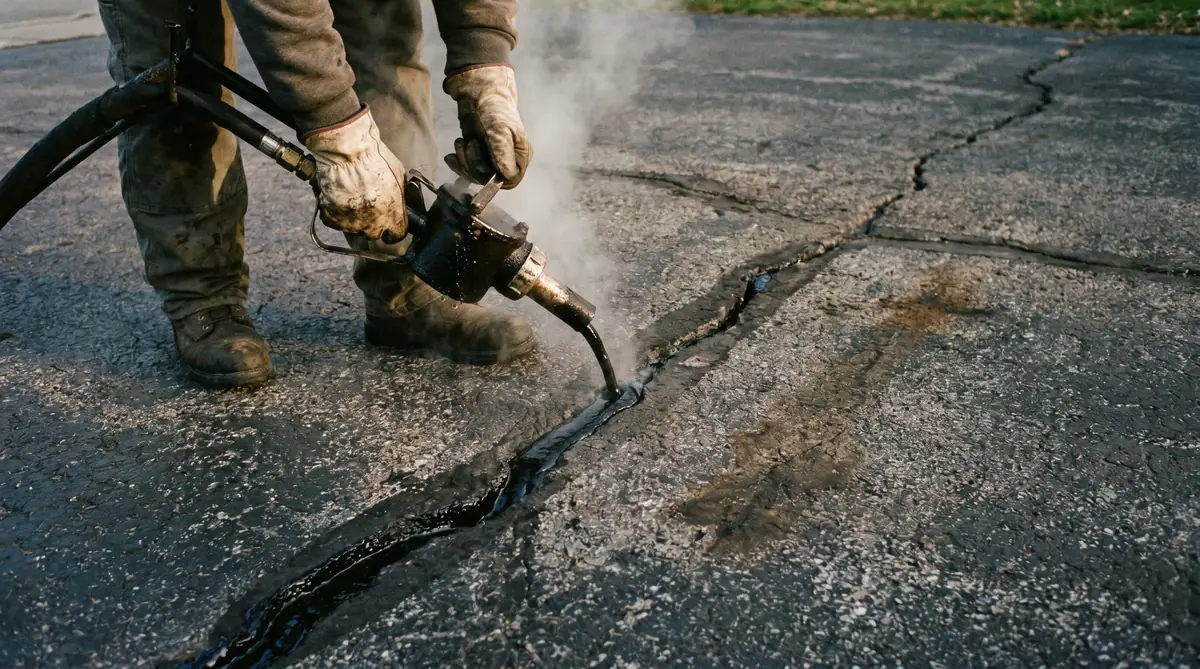
Hot Pour Rubberized Crack Filler
The highest-performing DIY option. Solid blocks heated in a pour pot (available to rent) and applied as a liquid. Once cooled, the rubber remains flexible — expanding and contracting with the pavement through temperature cycles. Lifespan: 3–7 years. Significantly better than cold pour for climates with harsh winters. Price: $30–$60 per 30-lb block + pour pot rental.
For a detailed product comparison including specific brand recommendations, see our dedicated best asphalt crack filler guide.
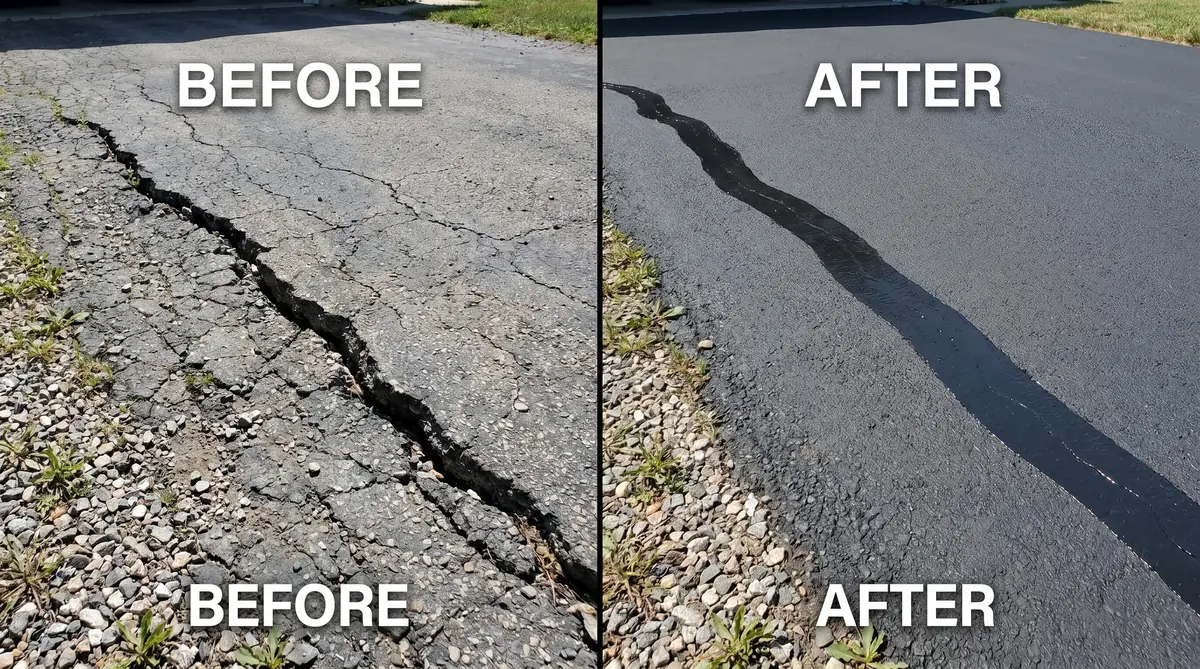
How to Fill Asphalt Cracks DIY — Step by Step
Asphalt crack filling is one of the most accessible DIY home maintenance tasks. No special skills or tools are needed for cold pour products. The key is preparation — a properly cleaned and dried crack bonds significantly better than one filled over dirt and debris.
- Choose the right day. Work when air temperature is above 50°F and no rain is forecast for 24 hours. Ideal conditions: dry, overcast day between 60–85°F. Hot sunny days cause cold pour filler to skin over too quickly before fully penetrating.
- Clean the crack thoroughly. Use a wire brush or crack cleaning tool to remove loose asphalt, dirt, and vegetation from inside the crack. For deep cracks, a pressure washer or compressed air nozzle removes debris that a brush can't reach. This step is the most skipped and the most important — filler won't adhere to dirty surfaces.
- Allow to dry completely. The crack must be completely dry before filling. Even slight moisture prevents proper adhesion. After pressure washing, allow at least 2–4 hours of drying time, longer in humid conditions. Speed dry with a heat gun or torch on low setting.
- For wide cracks, add backer rod. Cracks wider than ¾ inch should have foam backer rod pressed into the crack to within ½ inch of the surface. This prevents filler from sinking too deep and saves material. Backer rod is available at hardware stores for ~$5–$10.
- Apply the crack filler. Pour or squeeze filler into the crack, slightly overfilling (1/8 inch above the surface). Work in sections of 3–4 feet at a time. For cartridge products, maintain steady pressure and work smoothly along the crack. For hot pour, maintain proper temperature and work quickly.
- Smooth the surface. Use a putty knife, trowel, or squeegee to smooth the filler flush with the pavement surface. Feather the edges slightly onto the surrounding asphalt for a cleaner finish and better bond.
- Allow to cure. Cold pour filler: walk-on after 4–6 hours, drive-on after 24–48 hours. Hot pour rubber: walk-on after 30–60 minutes, drive-on after 2–4 hours once fully cooled. Don't apply sealcoat until filler has cured for at least 48 hours.
- Sealcoat when complete. Asphalt crack filling is most effective when followed by sealcoating within the same season. The sealcoat locks in the filler, protects the surrounding pavement, and restores appearance. Wait at least 48 hours after crack filling before applying sealcoat. Estimate sealcoat coverage with our sealcoating calculator.
Pro Tip: Fill Before Winter
The best time for asphalt crack filling is late summer or early fall — temperatures are right, the pavement has expanded to near its widest point from summer heat, and you have time for the filler to fully cure before the first freeze. Filling in spring after winter damage is reactive; filling in fall is preventive and more effective.
DIY vs Professional Asphalt Crack Filling
| Factor | DIY | Professional |
|---|---|---|
| Typical cost (80 lin ft) | $20–$80 | $120–$350 |
| Material quality | Cold pour (good) | Hot pour rubberized (better) |
| Lifespan | 1–3 years | 3–7 years |
| Time required | 1–3 hours | 1–2 hours (contractor) |
| Equipment needed | Wire brush, bottle/caulk gun | Melter/applicator truck |
| Best for | Minor to moderate cracking, budget-conscious | Heavy cracking, commercial, cold climates |
| Minimum service charge | N/A | $150–$300 |
For most residential driveways with moderate cracking, DIY cold pour is the right call — the savings are significant and results are perfectly adequate with proper prep. Go professional when: you have more than 200 linear feet of cracks, your climate has severe freeze-thaw cycles, the cracks keep returning after DIY filling, or you want a combined crack fill + sealcoat service done in one visit. Find a qualified contractor with our asphalt paving contractor guide.
Mistakes That Make Asphalt Cracks Worse
- Filling over a dirty crack. The #1 DIY failure. Filler applied over debris, dust, or moisture won't bond and pops out within weeks. Always clean and dry thoroughly.
- Filling alligator cracking. No amount of crack filler fixes structural failure. You'll waste money and the cracks will be back in one season. Alligator areas need removal and repaving.
- Using too much filler. Overfilling creates a raised ridge that peels and chips as traffic crosses it. Fill to slightly above flush, then smooth down — not above the surface.
- Filling in the wrong weather. Cold weather (below 50°F) prevents proper adhesion and curing. Wet conditions cause the filler to fail immediately. Filling in extreme heat causes the filler to stay liquid too long and not set properly.
- Skipping sealcoat after filling. Crack filler exposed to UV and traffic degrades faster without a protective sealcoat over it. Always plan to sealcoat within the same season.
- Using the wrong product for crack width. Thin liquid filler on a ¾ inch crack will sink and leave a void. Wide cracks need backer rod first, then filler. See our crack filler product guide for product-to-crack-width matching.
Don't Ignore Cracks Near the Driveway Edge
Edge cracks are often a symptom of a failing base or poor drainage rather than surface aging. Filling the crack without addressing the root cause — typically inadequate lateral support or water pooling at the edge — means the crack will return and widen each year. If your edge cracks keep coming back, have the base and drainage assessed before investing more in filler.
Frequently Asked Questions
What is the best material for asphalt crack filling?
Hot pour rubberized crack filler is the highest-performing option — it remains flexible through freeze-thaw cycles and lasts 3–7 years. For DIY use, cold pour liquid filler in squeeze bottles is the most practical and works well on cracks up to ½ inch wide. For a full product comparison, see our best asphalt crack filler guide.
How much does asphalt crack filling cost?
DIY asphalt crack filling costs $20–$80 in materials for a typical driveway (80 linear feet). Professional service runs $0.50–$1.50/linear ft for cold pour and $1.00–$3.50/linear ft for hot pour rubberized filler, plus a $150–$300 minimum service charge. Use our crack fill calculator for a precise material estimate.
Should I fill or seal asphalt cracks?
Fill first, then seal. Crack filling targets individual cracks with a dedicated filler material. Sealcoating is a surface-wide protective coating — it does not fill cracks on its own. Always complete crack filling and allow it to cure 48+ hours before applying sealcoat. Estimate your sealcoat coverage with our sealcoating calculator.
Can I fill asphalt cracks myself?
Yes — cold pour asphalt crack filling requires no special equipment. Clean the crack, let it dry, apply filler slightly overfilled, smooth flush, and allow 24–48 hours to cure before driving. For cracks wider than 1 inch or alligator cracking covering more than a few square feet, professional repair is the better choice.