Patio Pavement Price — Cost by Material, Size & Installation (2026)

The patio pavement price you pay depends entirely on the material you choose, the size of the patio, your site conditions, and whether you hire a contractor or go the DIY route. A basic gravel patio costs under $1,000. A natural stone patio with professional installation can run $15,000 or more. Most homeowners land somewhere in the middle — a 200–400 sq ft concrete or paver patio for $2,000–$8,000.
This guide breaks down 2026 patio paving prices by material, covers the best paving ideas for a patio at every budget, walks through a complete DIY installation process, and helps you decide whether to hire a contractor or tackle the project yourself. Use our paving cost calculator to estimate your specific patio before getting quotes.
In this guide
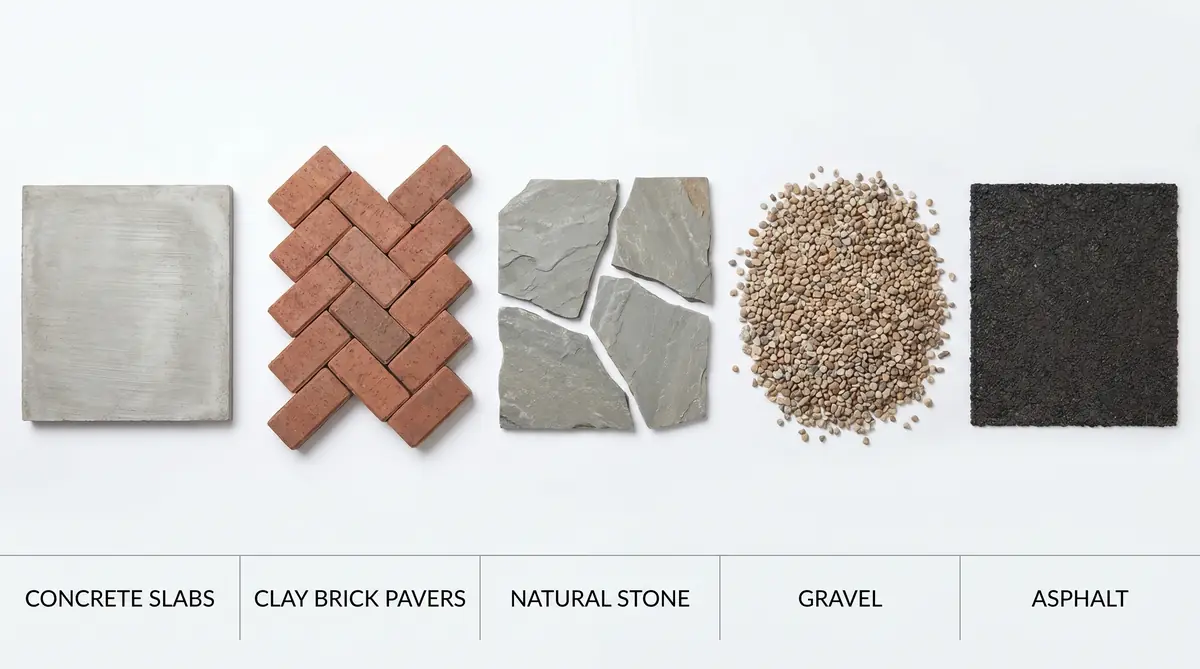
Patio Pavement Price by Material (2026)
These are 2026 US national average prices including materials and professional installation. DIY costs are 40–60% lower since you eliminate labor. All prices are per square foot unless stated otherwise.
| Material | DIY cost/sq ft | Installed cost/sq ft | 200 sq ft total | Lifespan |
|---|---|---|---|---|
| Gravel / crushed stone | $0.50–$1.50 | $1.00–$3.00 | $200–$600 | Indefinite (top up annually) |
| Poured concrete | $3–$6 | $6–$12 | $1,200–$2,400 | 25–40 years |
| Concrete pavers | $4–$8 | $8–$18 | $1,600–$3,600 | 25–50 years |
| Brick pavers | $5–$10 | $10–$20 | $2,000–$4,000 | 25–50 years |
| Flagstone / irregular stone | $8–$15 | $15–$30 | $3,000–$6,000 | 50+ years |
| Natural stone (bluestone, slate) | $10–$20 | $20–$40 | $4,000–$8,000 | 50–100 years |
| Porcelain / ceramic tile | $8–$15 | $15–$35 | $3,000–$7,000 | 20–40 years |
| Asphalt | $2–$4 | $3–$7 | $600–$1,400 | 20–30 years |
| Decomposed granite | $1–$3 | $2–$5 | $400–$1,000 | 5–10 years |
Most popular choice: Concrete pavers hit the sweet spot of cost, durability, and DIY-friendliness. At $8–$18/sq ft installed, a 300 sq ft patio runs $2,400–$5,400 — affordable for most budgets with a 25–50 year lifespan.
What Affects Patio Paving Cost?
The patio pavement price on any quote is driven by six core factors:
- Material choice — the biggest variable. Gravel costs 10–20x less than premium natural stone for the same area.
- Patio size — larger patios cost less per sq ft due to fixed mobilization and setup costs being spread across more area. A 400 sq ft patio is typically cheaper per sq ft than a 100 sq ft patio.
- Site preparation — sloped yards require grading and retaining, poor subgrade needs deeper excavation, and tree root removal adds significant cost. Flat sites with good drainage are the cheapest to prep.
- Base depth — a proper 4–6 inch compacted gravel base is non-negotiable for longevity. Shortcuts here cause sinking and cracking within a few years.
- Pattern complexity — simple running-bond brick is cheaper to install than herringbone, basketweave, or circular patterns, which require more cuts and take longer to lay.
- Region — labor costs vary significantly. The same patio that costs $8/sq ft in the Midwest may cost $14/sq ft in coastal California or the Northeast.
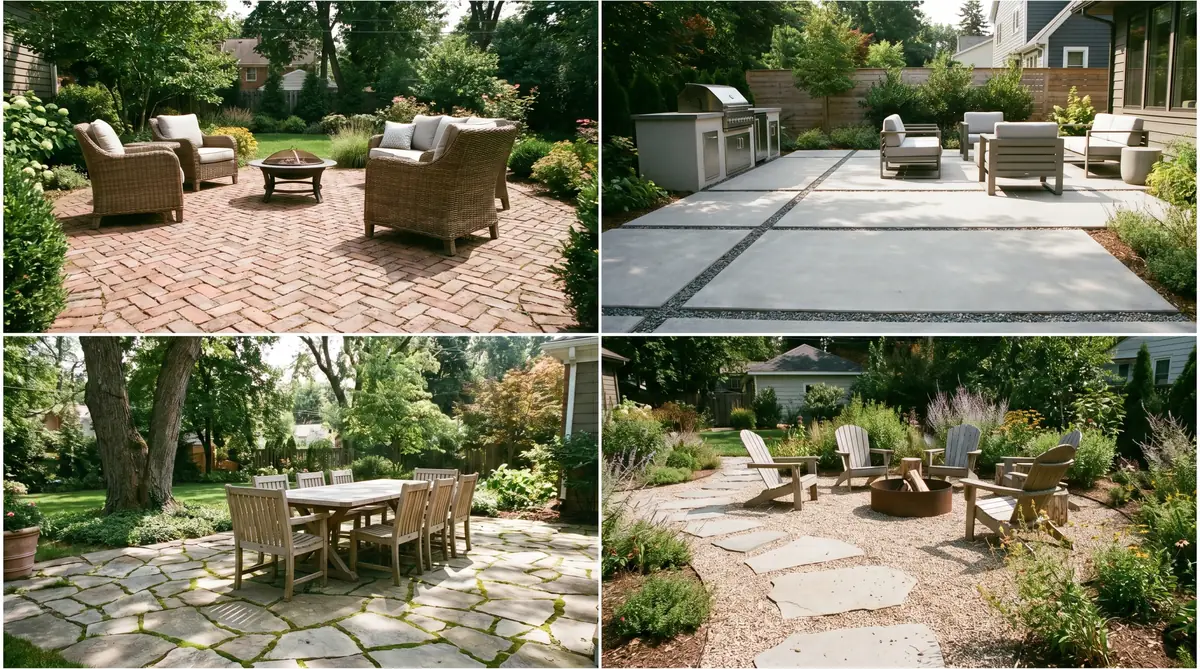
Popular Patio Paving Ideas
Choosing the right material and pattern transforms a backyard into an outdoor living space. Here are the most popular paved patio ideas for every budget in 2026:
Budget: Gravel or Decomposed Granite Patio ($200–$1,000)
Gravel patios are the most affordable option and surprisingly attractive when done well. Use a weed barrier membrane, edging restraints, and 3–4 inches of angular crushed stone or decomposed granite. Add large stepping stones for pathways. Estimate material quantities with our gravel calculator.
Mid-Range: Concrete Paver Patio ($2,000–$6,000)
Concrete pavers are the most popular paving and patio idea for mid-range budgets. They come in dozens of shapes, colors, and textures — from tumbled brick-look to large-format modern slabs. Herringbone and basketweave are classic residential patterns; large-format running bond looks contemporary. Pavers can be lifted and relaid if you need to access utilities underneath.
Premium: Natural Stone or Flagstone Patio ($5,000–$15,000+)
Irregular flagstone, bluestone, slate, or granite create the highest-end look. Each piece is unique, giving a natural organic appearance that concrete can't replicate. These patios add the most property value but require professional installation for best results.
Modern: Large-Format Porcelain Tile Patio ($4,000–$10,000)
24"×24" or 24"×48" porcelain pavers are trending in 2026. They offer a sleek, contemporary look, are virtually maintenance-free, and resist staining, fading, and frost. They require a very stable, flat concrete base — any movement cracks the tiles.
Rustic: Brick Paver Patio ($3,000–$8,000)
Clay brick adds timeless character and improves with age. Traditional herringbone or running bond patterns work for any style home. Brick is one of the most durable paver options — many brick patios from the 1950s are still in use today.
Best Paving Materials for a Patio — Pros & Cons
| Material | Best for | Pros | Cons |
|---|---|---|---|
| Concrete pavers | Most homeowners | Affordable, durable, DIY-friendly, repairable | Can look less premium than natural stone |
| Poured concrete | Low-maintenance flat patio | Seamless look, low cost, many finish options | Cracks over time, hard to repair invisibly |
| Brick pavers | Traditional / classic homes | Timeless look, very durable, ages beautifully | Higher cost, limited color options |
| Natural stone | Premium patios, high resale value | Unique, long lifespan, highest-end look | Most expensive, heavy, requires pro install |
| Flagstone | Rustic / organic aesthetic | Natural look, unique, good value for stone | Uneven surface, harder to maintain level |
| Gravel | Budget patios, pathways | Cheapest option, good drainage | Needs edging, shifts underfoot, weeds |
| Porcelain tile | Modern / contemporary homes | Low maintenance, weather-resistant, sleek look | Expensive, needs perfectly flat base |
How to Pave a Patio DIY — Step by Step
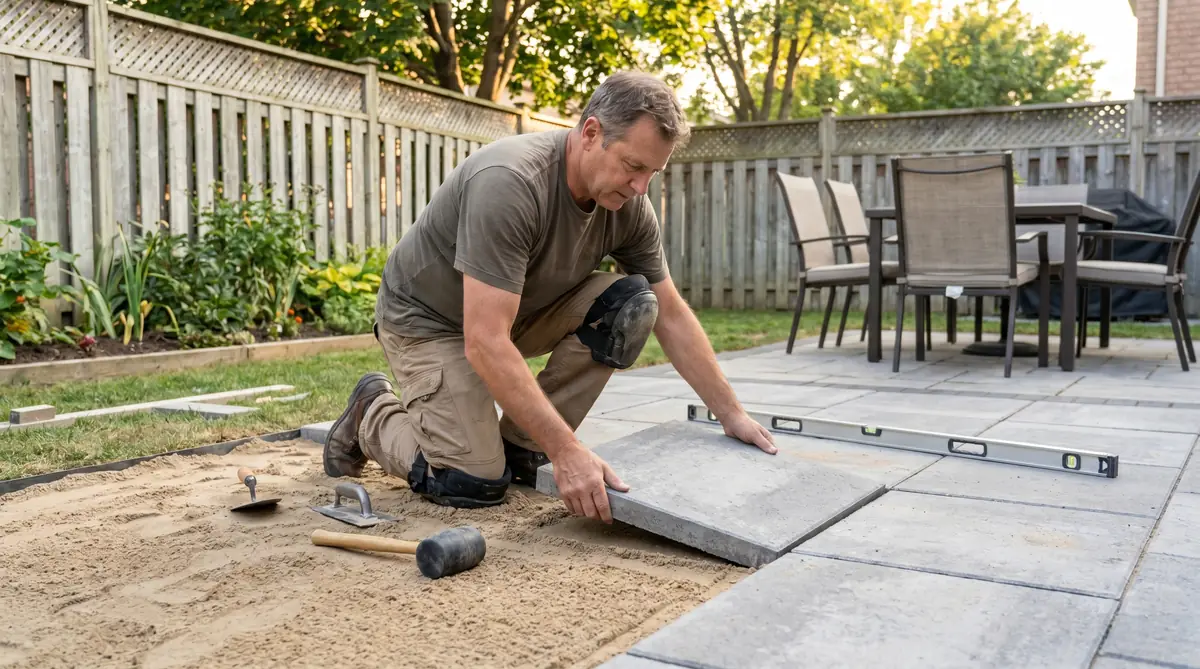
Paving a patio DIY is achievable for most homeowners with the right preparation. Concrete pavers on a compacted sand base are the best starting point — the process is forgiving, mistakes are fixable, and no special equipment is required beyond a plate compactor rental.
- Plan and mark the area. Use stakes and string to mark the patio perimeter. Calculate your square footage and add 10% for cuts and waste. Use our paving cost calculator to estimate materials.
- Excavate to depth. Dig out 6–8 inches below finished grade: 4–6 inches for the compacted gravel base + 1 inch bedding sand + paver thickness (typically 2–2.5 inches). Slope the base ⅛ inch per foot away from the house for drainage.
- Install edging restraints. Set plastic or metal paver edging around the perimeter before adding base material. This keeps pavers from spreading over time.
- Compact the subgrade. Run a plate compactor over the native soil. If the soil is clay-heavy or soft, add 2 inches of compactable fill. Rent a plate compactor — hand tamping is not sufficient for long-term stability.
- Lay and compact the gravel base. Add 4 inches of crushed stone (3/4" angular gravel) in two 2-inch lifts, compacting each lift. Use our crushed stone calculator to order the right amount.
- Screed the bedding sand. Add 1 inch of coarse bedding sand (not fine play sand) and screed it flat using two parallel pipes as guides. Do not walk on screeded sand before placing pavers.
- Set the pavers. Start from a corner or straight edge and work outward. Place each paver firmly and tap down with a rubber mallet. Keep joints consistent (typically ⅛–¼ inch). Cut border pavers with a masonry saw or chisel.
- Compact and fill joints. Run the plate compactor (with a protective pad) over the finished surface to seat the pavers into the sand. Sweep polymeric sand into all joints, mist lightly with water to activate, and repeat after 24 hours.
DIY Time Estimate
A 200 sq ft paver patio typically takes 2–3 weekends for a first-timer: one weekend for excavation and base, one for laying pavers, and a final session for cleanup and jointing. Hiring professional help just for excavation and base compaction — then DIYing the paver installation — is a popular hybrid approach that saves money while ensuring a solid foundation.
DIY vs Hiring a Contractor — Cost Comparison
| Factor | DIY (300 sq ft paver patio) | Contractor (300 sq ft paver patio) |
|---|---|---|
| Materials | $900–$1,800 | Included in total |
| Equipment rental | $150–$300 (plate compactor, saw) | Contractor provides all |
| Labor | Your time (3–4 weekends) | $1,500–$3,000 |
| Total cost | $1,050–$2,100 | $2,400–$5,400 |
| Potential savings | $1,350–$3,300 | |
| Risk | Mistakes require rework | Warranty covers defects |
| Result quality | Good with proper prep | Professional finish |
DIY patio paving saves $1,300–$3,300 on a typical 300 sq ft project — but only if the base preparation is done correctly. The most common DIY failure is inadequate base depth or compaction, which causes pavers to sink unevenly within 2–3 years. If you're not confident about excavation and compaction, hire a contractor for the groundwork and DIY the paver installation on top. For complex sites, slopes, or premium materials like natural stone, a professional paving contractor almost always delivers better long-term value.
How to Get an Accurate Patio Paving Quote
Before calling contractors, know your numbers. Use our paving cost calculator and asphalt project calculator to generate independent estimates. When requesting quotes, always specify:
- Exact dimensions — length × width in feet, and any irregular shapes
- Material preference — be specific about paver size, brand, and color if you have preferences
- Base depth required — ask each contractor what base depth they'll install and why
- Existing conditions — whether there's existing pavement to remove, tree roots, drainage issues, or significant slope
- Extras — edging, steps, drainage channels, lighting conduit, or sealing
Get at least 3 written quotes with itemized line items. A quote that simply says "patio installation — $4,500" without specifying base depth, material thickness, and scope is not comparable to a detailed quote. Ask every contractor what happens if they encounter unexpected subgrade issues — knowing the answer separates professionals from fly-by-night operators. See our full guide on hiring a paving contractor for more vetting tips.
Watch Out: Thin Base Shortcuts
The most common cost-cutting trick in patio installation is reducing base depth from the required 4–6 inches to 2 inches or less. The finished surface looks identical — but within 1–3 years, pavers begin to sink, tip, and shift. Always specify minimum 4 inches of compacted gravel base in writing, and ask the contractor how they'll verify it before paving begins.
Frequently Asked Questions
What is the cheapest patio paving option?
Gravel and crushed stone are the cheapest patio paving options at $1–$3 per sq ft installed. Decomposed granite is similar. For a proper hardscape patio, poured concrete at $6–$12/sq ft is the most affordable. Estimate your gravel quantity with our gravel calculator or stone quantity with our crushed stone calculator.
How much does it cost to pave a 20×20 patio?
A 20×20 patio (400 sq ft) costs: $400–$1,200 for gravel, $2,400–$4,800 for poured concrete, $3,200–$7,200 for concrete pavers, $6,000–$12,000 for natural stone. Labor accounts for 40–60% of total installed cost. DIY paver installation on 400 sq ft can save $1,500–$3,000 vs. hiring a contractor.
What is the most durable patio paving material?
Natural stone (bluestone, granite, slate) is the most durable patio paving material with a lifespan of 50–100+ years. Brick pavers are a close second at 25–50 years. Concrete pavers last 25–50 years with minimal maintenance. Poured concrete lasts 25–40 years but is prone to cracking and harder to repair invisibly.
Can I pave a patio myself?
Yes — patio paving is one of the most accessible DIY outdoor projects. Concrete pavers, brick, and gravel are the most DIY-friendly options. The critical steps are proper excavation depth and subbase compaction. Rent a plate compactor — hand tamping is not adequate. Poured concrete, large stone slabs, and porcelain tiles are harder to DIY and typically benefit from professional installation.