
How to Make Concrete Stepping Stones: Molds, Mix, Decorating and Setting a Path
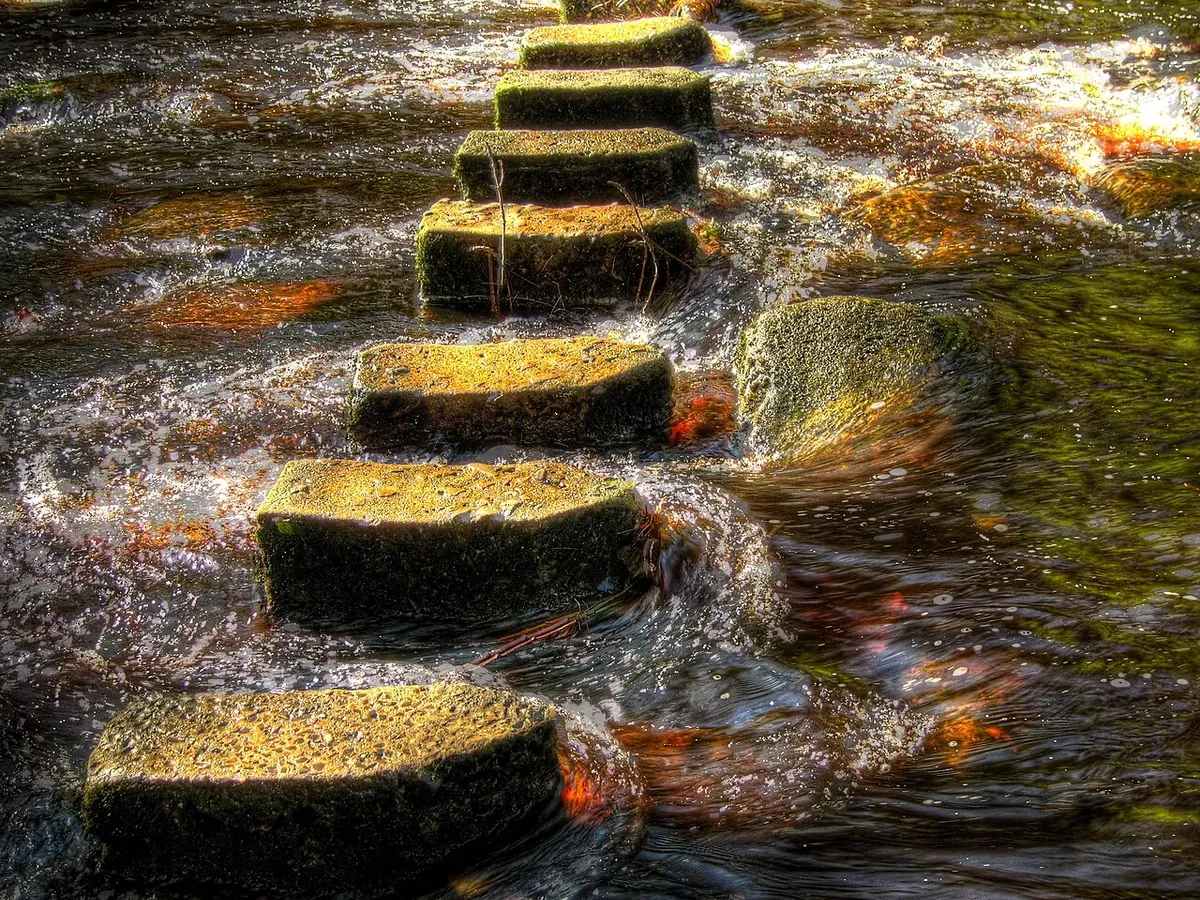
Photo: The Richardson Fosters, Stepping Stones, Wikimedia Commons, CC BY 2.0.
Quick Answer
To make concrete stepping stones, use a mold about 12 to 18 inches across and 2 inches deep, such as a plastic stepping stone mold, a cake pan, a plant saucer or a wood frame. Coat it with oil or cooking spray. Mix sand mix or concrete mix to a thick oatmeal consistency, fill the mold halfway, lay in a piece of wire mesh or hardware cloth, then fill to the top. Tap the mold to release bubbles, smooth the surface and press in any decorations. Cover it and demold after 24 to 48 hours, keep it damp for several days, then set it in the yard on 1 to 2 inches of sand, about 18 to 24 inches apart center to center. A 50-pound bag of sand mix makes roughly two to three 12-inch round stones, 2 inches thick.
Concrete stepping stones are one of the easiest and most rewarding concrete projects. They protect lawns from worn paths, lead guests through a garden, and can be decorated with handprints, leaves, mosaic tiles or names. Kids love helping. And because each stone is small, you can make a whole path a few at a time with very little equipment.
This guide explains how to make concrete stepping stones step by step, from picking molds and mixes to decorating, curing and setting them in your yard. It also covers do it yourself concrete stepping stones with special finishes, and how to make concrete table numbers for weddings and events using the same methods.
What You Need
- Molds: plastic stepping stone molds, cake pans, pizza pans with sides, plastic plant saucers, shallow storage lids, or a simple wood frame.
- Release: cooking spray, vegetable oil or form release oil.
- Mix: sand mix (topping mix) for smooth, detailed stones; standard concrete mix for rougher, stronger stones.
- Reinforcement: hardware cloth, chicken wire or wire mesh cut slightly smaller than the mold.
- Mixing tub or bucket, trowel or paint stick, water, measuring cup.
- Decorations: leaves, tiles, glass gems, pebbles, shells, letter stamps, pigment.
- Plastic sheet or bags for curing.
- Gloves, safety glasses and a dust mask.
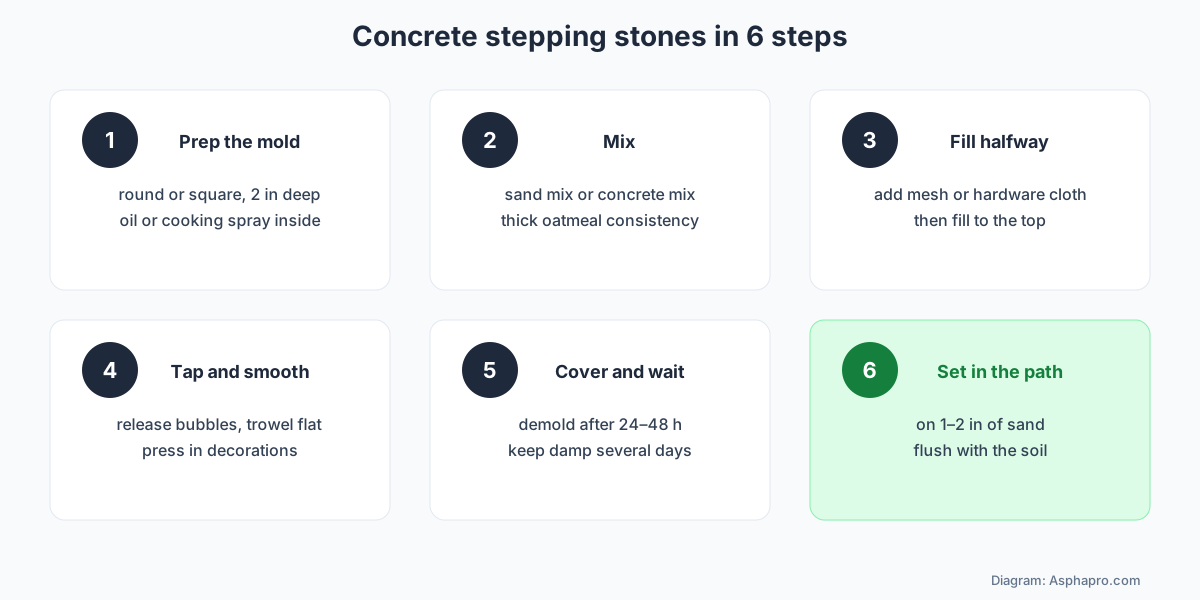
Step 1: Choose and Prepare the Mold
Size and shape are up to you, but some guidelines keep stones strong and comfortable to walk on:
- Size: about 12 to 18 inches across fits an adult foot comfortably. Larger stones are heavier and more likely to crack if unsupported.
- Thickness: about 2 inches is a good standard. Thinner than about 1½ inches tends to crack under foot traffic.
- Shape: round and square are easiest. Irregular natural shapes can be made with flexible plastic edging bent into shape on a sheet of plywood.
- Release: coat the inside with cooking spray or oil. For a reusable wood frame, screw corners so it comes apart.
- Work surface: set molds on a flat, level surface covered with plastic, in shade.
Step 2: Mix the Concrete
- Wear gloves, glasses and a dust mask.
- Pour the dry mix into a tub and add water a little at a time, stirring well.
- Aim for a thick oatmeal consistency: it holds its shape on a trowel but settles when you tap the tub.
- If adding pigment, mix it into the water first for even color.
- Mix only what you can use in 20 to 30 minutes.
Sand mix gives a smooth surface for decorating and fine detail. Standard concrete mix contains gravel and makes stronger, more rustic stones; it works best for stones 2 inches thick or more. See how much a bag of concrete costs for mix types and sizes.
Step 3: Fill, Reinforce and Fill Again
- Fill the mold about halfway.
- Lay a piece of hardware cloth or wire mesh, trimmed about an inch smaller than the mold on all sides, on the concrete.
- Fill the rest of the mold to the top.
- Reinforcement keeps the stone together if it cracks, and helps large stones survive being stepped on over uneven ground.
Step 4: Tap, Smooth and Decorate
- Tap the sides of the mold, or gently bounce the work surface, for a minute or two to bring air bubbles up.
- Strike off excess with a straight board and smooth with a trowel.
- Wait 30 to 60 minutes, until the surface is firm enough to hold an impression but still soft.
- Press in decorations: leaves, handprints, stones, tiles or letters.
- For a non-slip surface, lightly drag a soft broom or brush across the top.
Step 5: Cure and Demold
Cover the stones with plastic to slow drying. After about 24 to 48 hours, flip the mold over onto a soft surface and tap it to release the stone. Keep the stones damp and covered for several more days, as concrete gains strength while it stays moist. Concrete commonly reaches its design strength at about 28 days, so be gentle with stones in the first couple of weeks. See how long concrete takes to cure.
Step 6: Set the Stones in Your Yard
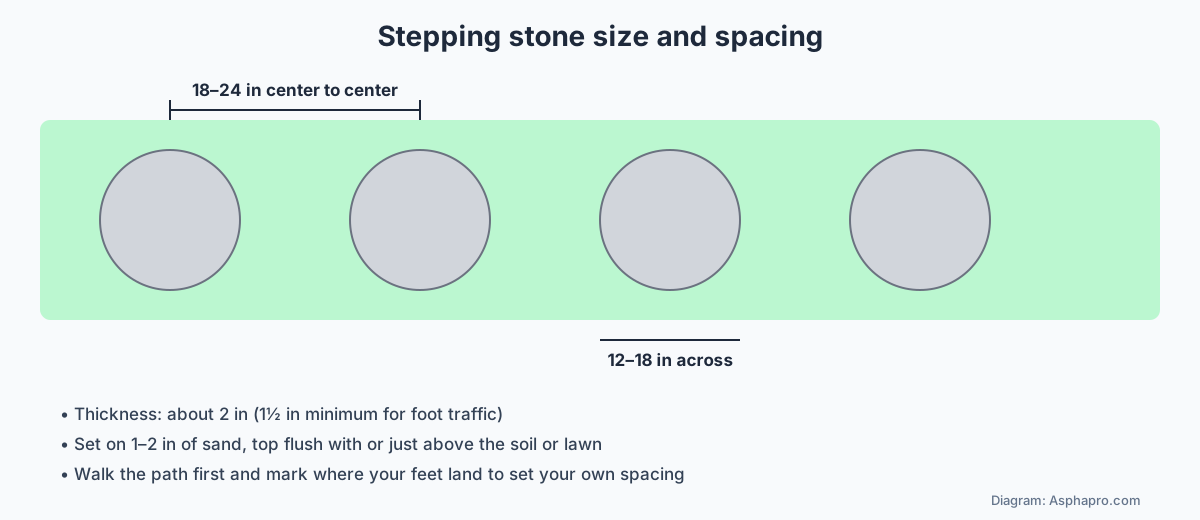
- Plan spacing: walk the route at a normal pace and mark where your feet land. Most paths end up about 18 to 24 inches center to center.
- Mark outlines: lay each stone in place and cut around it with a spade.
- Dig: remove sod and soil to the stone's thickness plus 1 to 2 inches.
- Add sand: spread 1 to 2 inches of sand and level it.
- Set the stone: place it, wiggle it into the sand, and tap with a rubber mallet until it is flush with or slightly above the soil or lawn, so a mower can pass over.
- Check for rocking: add or remove sand until it sits firmly.
- Backfill: fill around the edges with soil and water it in.
Finishing the Surface for Grip and Looks
The top finish decides how a stepping stone looks and how safe it feels when wet. A steel trowel gives a smooth, dense surface that shows decorations clearly but can be slippery in rain. A wood or magnesium float leaves a slightly sandy texture with better grip. A light broom finish, dragged across once the surface firms, gives the best traction for paths that get wet or icy. For a stone-like look, dab the surface with a damp sponge or press a piece of slate against it.
If you cast stones upside down, with the bottom of the mold becoming the top, the finish copies the mold surface. Smooth plastic molds give a glassy face, while textured mats or a layer of sand in the mold bottom give a rougher, natural face. Test one stone with each finish and walk on them in wet shoes before making the whole set.
Decorating Ideas for DIY Concrete Stepping Stones
- Leaf prints: press large leaves like hosta, fern or rhubarb vein-side down into the surface once it firms. Peel them off after a day for a detailed fossil look.
- Handprints and footprints: a classic family keepsake. Coat hands with petroleum jelly or wear a thin glove, press briefly, then wash right away; wet cement is alkaline and can irritate skin.
- Mosaic tiles and glass gems: press pieces into the surface so they sit flush, or place them face-down in the mold first with contact paper so they show on the finished top.
- Pebbles and shells: press in smooth river stones for texture and grip.
- Names and dates: write with a stick or press in letter stamps when the surface is firm.
- Colored concrete: add pigment to the whole batch, or brush a thin layer of colored mix in the mold before filling.
- Exposed aggregate: after a few hours, lightly brush and mist the surface to reveal sand and small stones.
- Glow stones: glow-in-the-dark aggregate or glass gems pressed into the top light up paths at night.
- Stamped patterns: rubber mats, doilies or texture sheets pressed into the surface.
Make Your Own Molds
Plastic stepping stone molds are cheap and reusable, but you can make your own concrete stepping stones in almost any shape:
- Wood frame: four pieces of 2x2 or 1x3 screwed into a square, set on plywood covered with plastic. Unscrew one corner to release the stone.
- Flexible edging: a strip of plastic garden edging or flashing bent into a free-form shape and taped into a ring on a plywood base.
- Cardboard boxes: cut down to 2 inches deep and lined with packing tape. Peel away after the stone sets.
- Household items: cake pans, pie tins, pizza pans with rims, plastic plant saucers and storage lids.
- Sand molds: dig a shallow shape in damp sand and pour directly into it for a rough, natural stone.
Cast-in-Place Stepping Stones
Instead of making stones in molds and moving them, you can pour concrete stepping stones right where they will live:
- Mark the path and cut each shape into the lawn with a spade.
- Dig each hole about 3 to 4 inches deep and add about 1 to 2 inches of compacted gravel.
- Set a reusable form ring or edging in each hole, or use the cut soil edges as the form.
- Fill with concrete mix, add a piece of mesh in the middle, smooth and finish.
- Cover with plastic to cure, then remove forms and backfill.
Reusable "path molds" sold at home centers make a cobblestone pattern you fill, lift and move along, which is a fast way to build a long garden walk. See paving a patio DIY for bigger hardscape projects.
How to Make Concrete Table Numbers
Concrete table numbers are popular for weddings, parties and restaurants with a modern or rustic look. They use the same methods as stepping stones, on a smaller scale.
- Molds: buy silicone number molds made for concrete or resin crafts, or make molds by gluing foam or plastic number shapes into a small box. For block-style table numbers, use small square containers and press number stamps into the face.
- Mix: a fine sand mix, a countertop mix or a craft cement gives smooth, crisp edges. Mix it a little wetter than for stepping stones so it fills corners, but not soupy.
- Holder slot: for numbers that hold a card or menu, press a thin piece of plastic or a coin into the top while wet to form a slot, and pull it out once the concrete firms.
- Vibrate: tap the mold well; bubbles show more on small pieces.
- Demold and finish: after 24 hours, demold, sand edges with fine sandpaper, and seal with a clear concrete sealer so they do not mark tablecloths.
- Protect tables: add felt pads under each number.
White concrete looks especially clean for event table numbers; see how to make concrete planters for how to make white concrete. Make a few spares, because thin numbers can chip in transport.
Making Stepping Stones With Kids
- An adult should handle dry mix and mixing, since cement dust irritates eyes and lungs.
- Give kids gloves and let them press in decorations, write names and make handprints.
- Wash hands promptly after any contact with wet concrete.
- Pick a theme, like a nature stone with leaves and pebbles, or a family stone with every handprint and the year.
- Let kids help choose where their stone goes in the garden.
Troubleshooting
The stone cracked
Usually from too much water in the mix, a stone that is too thin, drying too fast, uneven support in the ground, or walking on it too early. Use a stiffer mix, 2-inch thickness, mesh and slow curing, and set it on a level sand bed.
The stone will not come out of the mold
Not enough release oil, or the mold has straight sides. Flex plastic molds, tap the back firmly, or take apart wood frames. Use more oil next time.
Pitted, bubbly surface
Tap or vibrate longer. Remember that the bottom of the mold becomes the top if you flip stones over; many makers decorate the bottom of the mold for a perfectly smooth face.
Decorations popped out
They were not pressed deep enough. Press tiles and stones in at least halfway, or glue them back with exterior construction adhesive.
White chalky film
Efflorescence. Brush it off dry; it usually fades. Sealing helps.
Stones rock or sink in the lawn
The base is uneven or soft. Lift the stone, add and level sand, and reset.
Sealing and Winter Care
Sealing is optional, but a penetrating concrete sealer makes stones resist stains, moss and freeze-thaw damage and keeps colors brighter. Let stones cure for at least a few weeks before sealing; see how to seal concrete. In cold climates, avoid deicing salt on stepping stones, which can flake the surface; use sand for grip instead. See does salt damage concrete. Stones set flush on a drained sand bed handle frost better than stones sitting in a soggy low spot.
Cost: Make or Buy?
Making concrete stepping stones is very cheap per stone, especially in batches: a reusable mold and one bag of mix produce several stones. Store-bought precast stepping stones are inexpensive too, but homemade stones let you choose the size, shape, color and decoration. For a long path, a reusable path mold or cast-in-place stones often costs less than buying precast pavers. See concrete cost per square foot if you are comparing with a poured walkway.
How Many Stones Per Bag?
A 12-inch round stone 2 inches thick is about 0.13 cubic feet. A 50-pound bag of sand mix yields roughly 0.4 to 0.5 cubic feet, depending on the product, and an 80-pound bag of concrete mix about 0.6 cubic feet. So:
| Stone size (2 in thick) | Volume | Stones per 50-lb sand mix bag | Stones per 80-lb concrete bag |
|---|---|---|---|
| 12 in round | about 0.13 cu ft | about 3 | about 4 |
| 16 in round | about 0.23 cu ft | about 2 | about 2 to 3 |
| 12 in square | about 0.17 cu ft | about 2 to 3 | about 3 |
| 18 in square | about 0.38 cu ft | about 1 | about 1 to 2 |
Always check the yield printed on your bag. See how many bags of concrete are in a yard for bag yields.
Mixing Your Own From Cement, Sand and Gravel
Bagged mixes are easiest, but if you are making many concrete stepping stones, mixing your own from bulk materials can save money. A common general-purpose concrete ratio is about 1 part portland cement, 2 parts sand and 3 parts gravel by volume. For smoother stones without gravel, use about 1 part cement to 2 to 3 parts sand. Add water gradually until the mix reaches the thick oatmeal stage. Measure with the same bucket every time so each batch matches, especially if you add pigment. See what concrete is made of for how the ingredients work together.
Weather and Timing
Make stepping stones on mild days, ideally between about 50 and 80°F, in the shade. Hot sun and wind dry the surface too fast and cause cracks; cover stones right after finishing. In cool weather, concrete sets slowly, so wait longer before demolding. Do not let fresh stones freeze in the first few days. Plan to set your stones in the yard when the ground is workable, not frozen or waterlogged.
Garden Path Design Ideas
- Curving path: lay a garden hose in a gentle curve and set concrete stepping stones along it for a natural look.
- Mixed sizes: alternate large and small stones, or set pairs side by side for a wider path.
- Stones in gravel: set stepping stones in a bed of pea gravel or crushed stone instead of lawn for low maintenance.
- Ground covers between stones: creeping thyme, moss or low sedum soften the edges and tolerate light foot traffic.
- Stepping stones to a gate, shed or fire pit: a short line of stones protects the lawn where people walk most. See paving for a fire pit.
- Through a vegetable garden: stones between beds keep shoes clean and soil uncompacted.
- Lights: solar lights beside the path, or glow stones in the concrete, guide night walking.
Stepping Stones on Slopes
On gentle slopes, set each concrete stepping stone level from side to side, with its front edge slightly lower than its back for drainage, and dig a deeper sand bed on the downhill side. On steeper slopes, stones become steps: set each one into the hill with its back edge buried, and support the front with compacted gravel so it does not slide. For true outdoor stairs, see concrete steps cost.
Maintenance
- Trim grass around stones so they stay visible, tidy and mower-friendly through the season.
- Reset any stone that rocks or sinks by lifting it and adding sand.
- Scrub off moss or algae in shady spots; see how to clean concrete.
- Reseal decorated stones every few years to keep colors bright.
Planning a Whole Path
Before you mix the first batch, work out how many stepping stones you need and how much mix to buy.
- Measure the route: lay a hose or string along the path and measure its length in inches.
- Divide by spacing: a 30-foot path (360 inches) with stones every 20 inches needs about 18 stones.
- Pick the size: 14-inch rounds, 2 inches thick, are about 0.18 cubic feet each.
- Total volume: 18 × 0.18 ≈ 3.2 cubic feet.
- Bags: at about 0.45 cubic feet per 50-pound bag of sand mix, that is about 7 to 8 bags, plus one spare.
- Molds: with three molds and one batch a day, the path takes about a week of pours, or less with more molds.
- Sand for setting: about 1 to 2 inches under each stone; a few bags of all-purpose sand usually cover a short path.
Write the plan down and keep a few extra stones. If one cracks or you extend the path later, matching stones will already be on hand.
Safety Notes
- Wear gloves, safety glasses and a dust mask when handling dry mix and mixing.
- Wet concrete is alkaline and can burn skin with prolonged contact; rinse off promptly.
- Lift heavy stones with your legs, or use a hand truck for big ones.
- Let leftover concrete harden in the tub and throw it away; never wash it down a drain.
Quick Reference
- How to make concrete stepping stones: oiled mold, thick mix, mesh in the middle, tap, smooth, decorate, cover, demold in 1 to 2 days.
- Do it yourself concrete stepping stones size: about 12 to 18 inches across, 2 inches thick.
- Spacing: about 18 to 24 inches center to center.
- How to make concrete table numbers: fine mix in silicone number molds, sand edges, seal, felt pads underneath.
- Setting concrete stepping stones: on 1 to 2 inches of sand, flush with the lawn.
Once you have made a few, you will see why so many gardeners learn how to make concrete stepping stones: the materials are cheap, the skills carry over to planters, benches and edging, and every stone can be one of a kind. Start with a small set, learn how your mix and molds behave, then scale up to a full path.
Frequently Asked Questions
What is the best concrete for stepping stones?
Sand mix for smooth, detailed stones; standard concrete mix for stronger, rustic stones at least 2 inches thick.
How thick should concrete stepping stones be?
About 2 inches. Thinner than about 1½ inches is prone to cracking.
How long do stepping stones take to dry?
Demold after 24 to 48 hours. Wait about a week before setting them and longer before heavy use.
Do I need to reinforce stepping stones?
It is recommended. A piece of hardware cloth or wire mesh in the middle helps stones survive cracks.
How far apart should stepping stones be?
Usually about 18 to 24 inches center to center, based on your stride.
Can I use a cake pan as a mold?
Yes. Coat it with cooking spray and keep it for crafts afterward.
How do you make concrete table numbers?
Cast fine sand mix or craft cement in silicone number molds, tap out bubbles, demold after a day, sand the edges and seal.
Can I put stepping stones directly on grass?
They will sink and rock over time. Cut out the sod and set each stone on 1 to 2 inches of sand, flush with the lawn.
How do you keep stepping stones from cracking?
Use a stiff mix, make them about 2 inches thick, add mesh, cure slowly under plastic, and set them on a level base.
Should I seal concrete stepping stones?
It is optional. A penetrating sealer helps resist stains, moss and freeze-thaw damage.
Sources
- Portland Cement Association, concrete curing basics. cement.org
- Bagged sand mix and concrete mix yield charts from manufacturers.
- Image credits: stepping stones photo by The Richardson Fosters, Wikimedia Commons (CC BY 2.0); diagrams by Asphapro.com.
Wear gloves and eye protection when working with cement. Checked November 2026.
Related Guides
- How to make concrete planters — DIY pots and white concrete