
How to Reseal Concrete: Step by Step, Sealer Types and Dry Times
Quick Answer
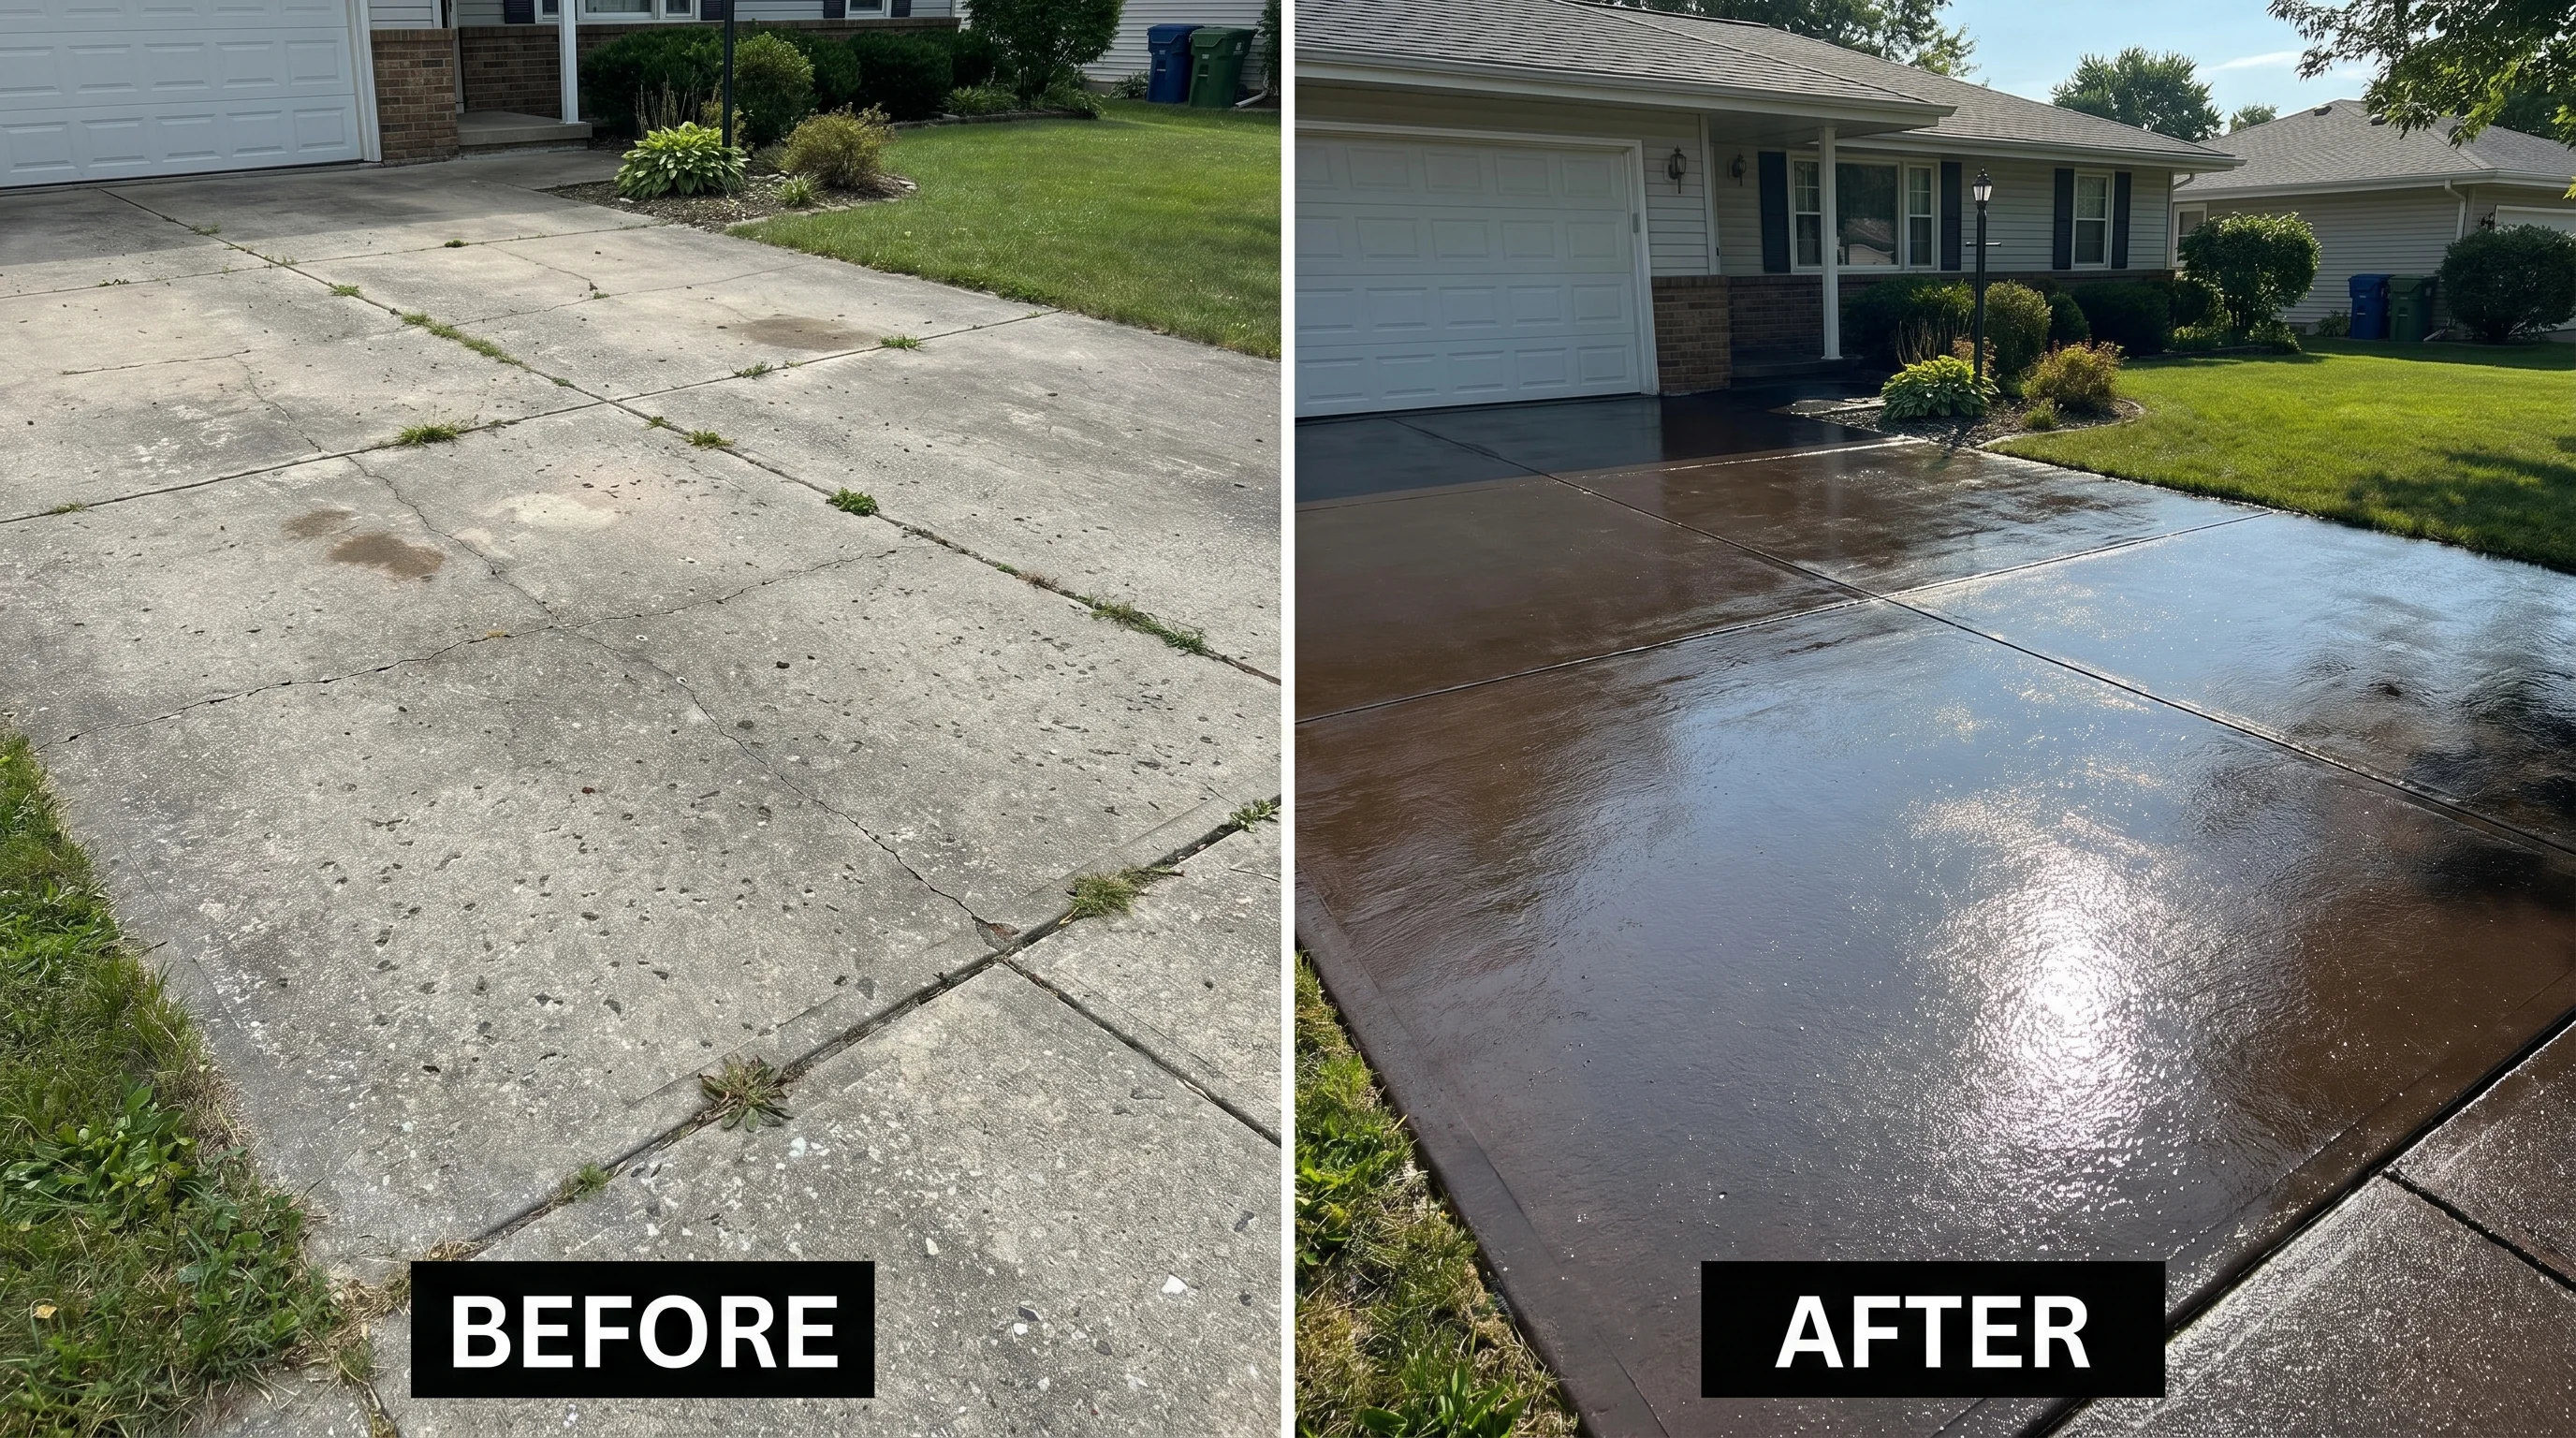
To reseal concrete, first test the old sealer by sprinkling water on it; if water soaks in, it is time. Clean the surface thoroughly, remove oil stains, repair cracks, and let it dry for at least 24 hours. Use the same type of sealer as before (penetrating over penetrating, acrylic over acrylic) or strip the old one first. Apply thin, even coats with a roller or pump sprayer in mild, dry weather, usually above about 50°F with no rain forecast. As for how long concrete sealer takes to dry: many products are dry to the touch in about 1 to 4 hours, ready for foot traffic in about 24 hours, and for vehicles in about 48 to 72 hours, but always follow the label.
Sealing concrete is one of the simplest ways to protect it. A good sealer slows water and salt absorption, resists stains, reduces freeze-thaw damage, and, for decorative concrete, brings out color. But sealers do not last forever. Penetrating sealers wear out over several years, and film-forming acrylic sealers can wear in traffic paths in a year or two. Knowing how to reseal concrete correctly keeps it protected without the common problems of white haze, peeling and slippery surfaces.
This guide explains how to seal and reseal concrete step by step, how to choose a sealer, how long concrete sealer takes to dry, when to seal new concrete, and how to fix common sealing problems.
Types of Concrete Sealers
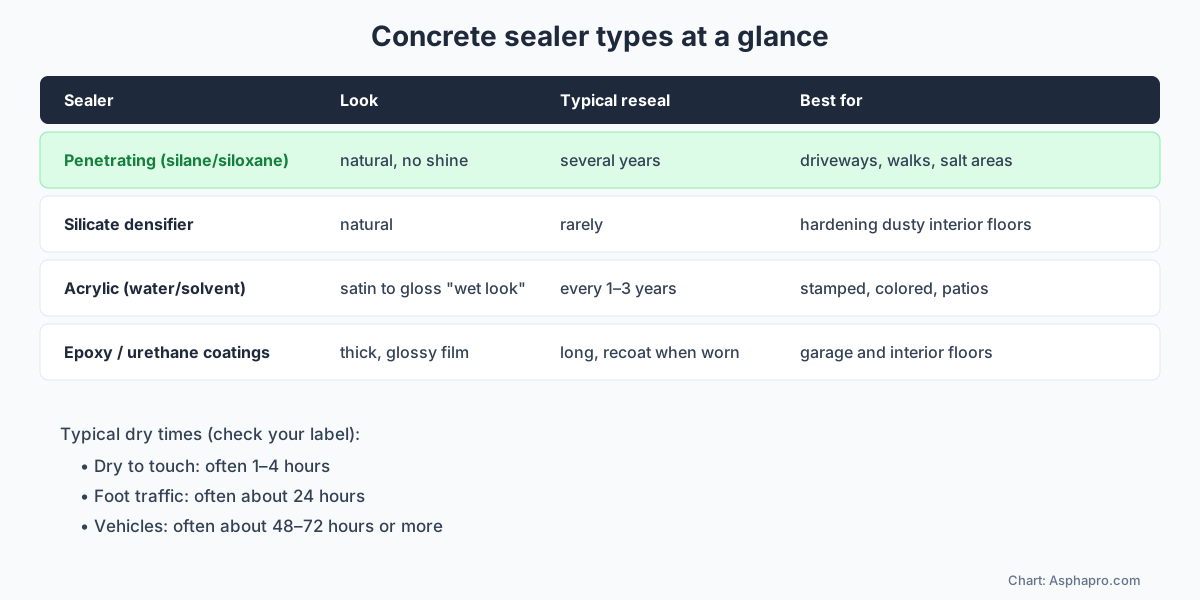
Penetrating sealers (silane, siloxane)
These soak into the concrete and react inside the pores to form a water-repellent barrier, without forming a film on top. They keep a natural look, do not change traction, and let water vapor escape. They are the best choice for driveways, walks and other exterior concrete exposed to freeze-thaw and deicing salt. They typically last several years before reapplication.
Silicate densifiers
Sodium, potassium or lithium silicates react with the cement paste to harden and densify the surface. They are used on interior floors, in polishing, and on dusty slabs. They are not strong water repellents on their own.
Acrylic sealers
Water-based or solvent-based acrylics form a thin film on the surface. They give a satin to glossy "wet look" that enhances color, making them popular for stamped, stained and exposed aggregate concrete. They wear faster than penetrating sealers, typically needing resealing every one to three years, and can be slippery when wet unless an anti-slip additive is used.
Epoxy and urethane coatings
Thick, durable films used mainly on garage and interior floors. They are more coatings than sealers and need careful surface prep. See concrete coating cost.
For more on choosing a product, see concrete sealer.
When to Reseal Concrete
- The water test: sprinkle water on the concrete. If it beads up, the sealer is still working. If it darkens the concrete and soaks in within a minute or so, it is time to reseal.
- Worn traffic paths: acrylic sealers wear in walkways and tire paths; the finish looks dull or patchy.
- Faded color: on stamped and stained concrete, colors look washed out.
- Before winter: fall is a good time to reseal exterior concrete in cold climates, while temperatures are still mild.
How to Reseal Concrete Step by Step
1. Identify the existing sealer
Resealing works best with the same type of sealer. A glossy or satin film is probably acrylic. A natural look that beads water is probably penetrating. For acrylics, you can test whether it is solvent- or water-based: a few drops of xylene re-soften solvent-based acrylic, making it tacky. If you do not know, test a small area with the new sealer and check adhesion and appearance after it dries.
2. Clean thoroughly
Sweep, then wash with a concrete cleaner or degreaser and a stiff brush or pressure washer. Remove oil, rust and other stains first; sealers lock stains in. See how to clean concrete and how to remove oil stains from concrete.
3. Repair
Fill cracks and spalls with appropriate repair products, and seal joints with a flexible joint sealant. See why concrete cracks.
4. Let it dry
Most sealers need dry concrete, often at least 24 hours after washing in good weather. Moisture trapped under film-forming sealers causes white haze. Tape plastic on the surface for a few hours; if moisture appears under it, wait longer.
5. Check the weather
Many sealers call for temperatures above about 50°F during application and for several hours after, with no rain for at least 24 hours. Avoid direct hot sun, which can make sealers dry too fast and bubble. Follow the label.
6. Apply thin coats
- Penetrating sealers: apply with a low-pressure pump sprayer until the surface is saturated but not puddled, then back-roll or broom out any puddles. Some products call for a second coat wet-on-wet.
- Acrylic sealers: apply with a roller or sprayer in thin, even coats. Two thin coats are better than one thick coat. Thick coats trap solvent or moisture and turn white or peel.
- Work in manageable sections and keep a wet edge to avoid lap marks.
- Add an anti-slip grit to acrylic sealers on walkways and pool decks.
7. Let it dry and cure
Keep people, pets and vehicles off for the times on the label.
How Long Does Concrete Sealer Take to Dry?
How long does it take concrete sealer to dry enough to walk on? Usually a few hours. How long does it take for concrete sealer to dry enough for cars is longer, often a day or more, so check the label before you open the driveway.
It depends on the product, coat thickness, temperature and humidity. As general ranges:
- Dry to the touch: often about 1 to 4 hours.
- Recoat: often a few hours, per the label, sometimes the same day.
- Light foot traffic: often about 24 hours.
- Vehicle traffic: often about 48 to 72 hours, sometimes longer in cool, humid weather.
- Full cure: can take several days to a week or more for some film-forming sealers and coatings.
Cool temperatures, high humidity and thick coats all slow drying. Penetrating sealers often allow traffic sooner than acrylics or coatings. Always use the times on your product label as the final word.
Why Seal Concrete at All?
Concrete is porous. Water, salt brine, oil, rust, leaf tannins and food spills all soak into its pores. In cold climates, water inside the surface freezes and expands, and over many winters this flakes the top layer off in a process called scaling. Deicing salt makes it worse by keeping the surface wet and by carrying chlorides toward any reinforcing steel. A sealer slows all of that down. It keeps water and brine from soaking in, makes stains easier to clean before they set, and on decorative concrete it protects and deepens the color.
Sealing is not required for every slab. Interior slabs that stay dry, and exterior concrete in mild, dry climates without deicers, may do fine without it. But for driveways, walks, steps and patios in places with freezing winters, sealing every few years is one of the cheapest ways to make concrete last. See does salt damage concrete and how long concrete lasts.
Sealing New Concrete vs Resealing Old Concrete
New concrete and old concrete need slightly different approaches.
New concrete
Fresh concrete contains a lot of water and is still curing. Many sealer makers recommend waiting about 28 days before applying a sealer, so the concrete has cured and dried enough. Some products are designed as cure-and-seal compounds that go on right after finishing; they help curing and give some early protection, and are usually followed by a regular sealer later. If you are pouring in late fall, ask about a product that can be applied before the first freeze, since the first winter is when concrete is most vulnerable.
Old concrete that was never sealed
Clean it thoroughly, repair cracks and spalls, and let it dry. Old, unsealed concrete is usually more porous at the surface, so it may soak up more sealer; plan on the higher end of the coverage rate or a second coat for penetrating sealers.
Old concrete with an existing sealer
This is resealing. The key is compatibility with the old sealer and good cleaning. If the old sealer is peeling, cloudy or a different type than the new one, strip it first.
Stripping Old Sealer
Sometimes you need to remove the old sealer before resealing, for example when switching from an acrylic to a penetrating sealer, or when the old acrylic is peeling or badly hazed.
- Chemical strippers: products made for removing acrylic sealers soften the film so it can be scraped and pressure washed off. Follow label safety steps and protect plants.
- Solvent re-wetting: for solvent-based acrylics with minor haze, rolling on xylene can re-dissolve the film and let trapped moisture escape, without fully stripping it.
- Mechanical removal: grinding or light shot-blasting removes coatings and sealers, mostly on interior floors.
- Penetrating sealers do not form a film and generally do not need stripping; they wear out gradually and can be reapplied.
How Much Sealer Do You Need?
Coverage depends on the product and the porosity of the concrete. As a rough guide, many acrylic sealers cover roughly 200 to 300 square feet per gallon per coat, and many penetrating sealers cover roughly 100 to 250 square feet per gallon depending on porosity, but labels vary widely. Measure your area, check the label coverage, and buy a little extra. A two-car driveway of about 600 square feet may need several gallons for one coat of penetrating sealer. Very porous or broom-finished surfaces use more than smooth ones.
Tools for Sealing
- Pump sprayer with a nozzle compatible with the sealer (solvent-based products need solvent-resistant seals).
- Medium-nap roller with an extension pole, and a roller tray.
- Paintbrush for edges.
- Push broom or squeegee for spreading puddles of penetrating sealer.
- Pressure washer and concrete cleaner for prep.
- Painter's tape and plastic to protect walls, doors and plants.
- Gloves, eye protection and, for solvent-based products, a respirator rated for organic vapors.
Resealing Stamped and Decorative Concrete
Stamped, colored and stained concrete is usually sealed with an acrylic sealer to protect the color and give it depth. Resealing every two to three years keeps it looking good. Clean it well, make sure it is completely dry, and apply thin coats. Use a roller for even coverage, and backroll sprayed sealer so it does not pool in the texture, where thick puddles turn white. Add anti-slip grit to the final coat on walkways and pool decks. If the old sealer has turned white or patchy, re-wet it with xylene (for solvent-based acrylics) or strip it before resealing. See stamped concrete vs pavers and concrete staining.
Resealing a Concrete Driveway
Most plain concrete driveways do best with a penetrating silane or siloxane sealer. It will not change the look much or make the surface slippery, and it repels water and salt brine. Clean the driveway, remove oil spots, seal cracks and joints, and let it dry. Apply the sealer with a pump sprayer, keeping the surface wet but not puddled, and work from the top of the slope down. Keep cars off for the time on the label, often about two to three days. Plan to retest and reseal every several years. See concrete driveway cost.
Resealing a Garage Floor
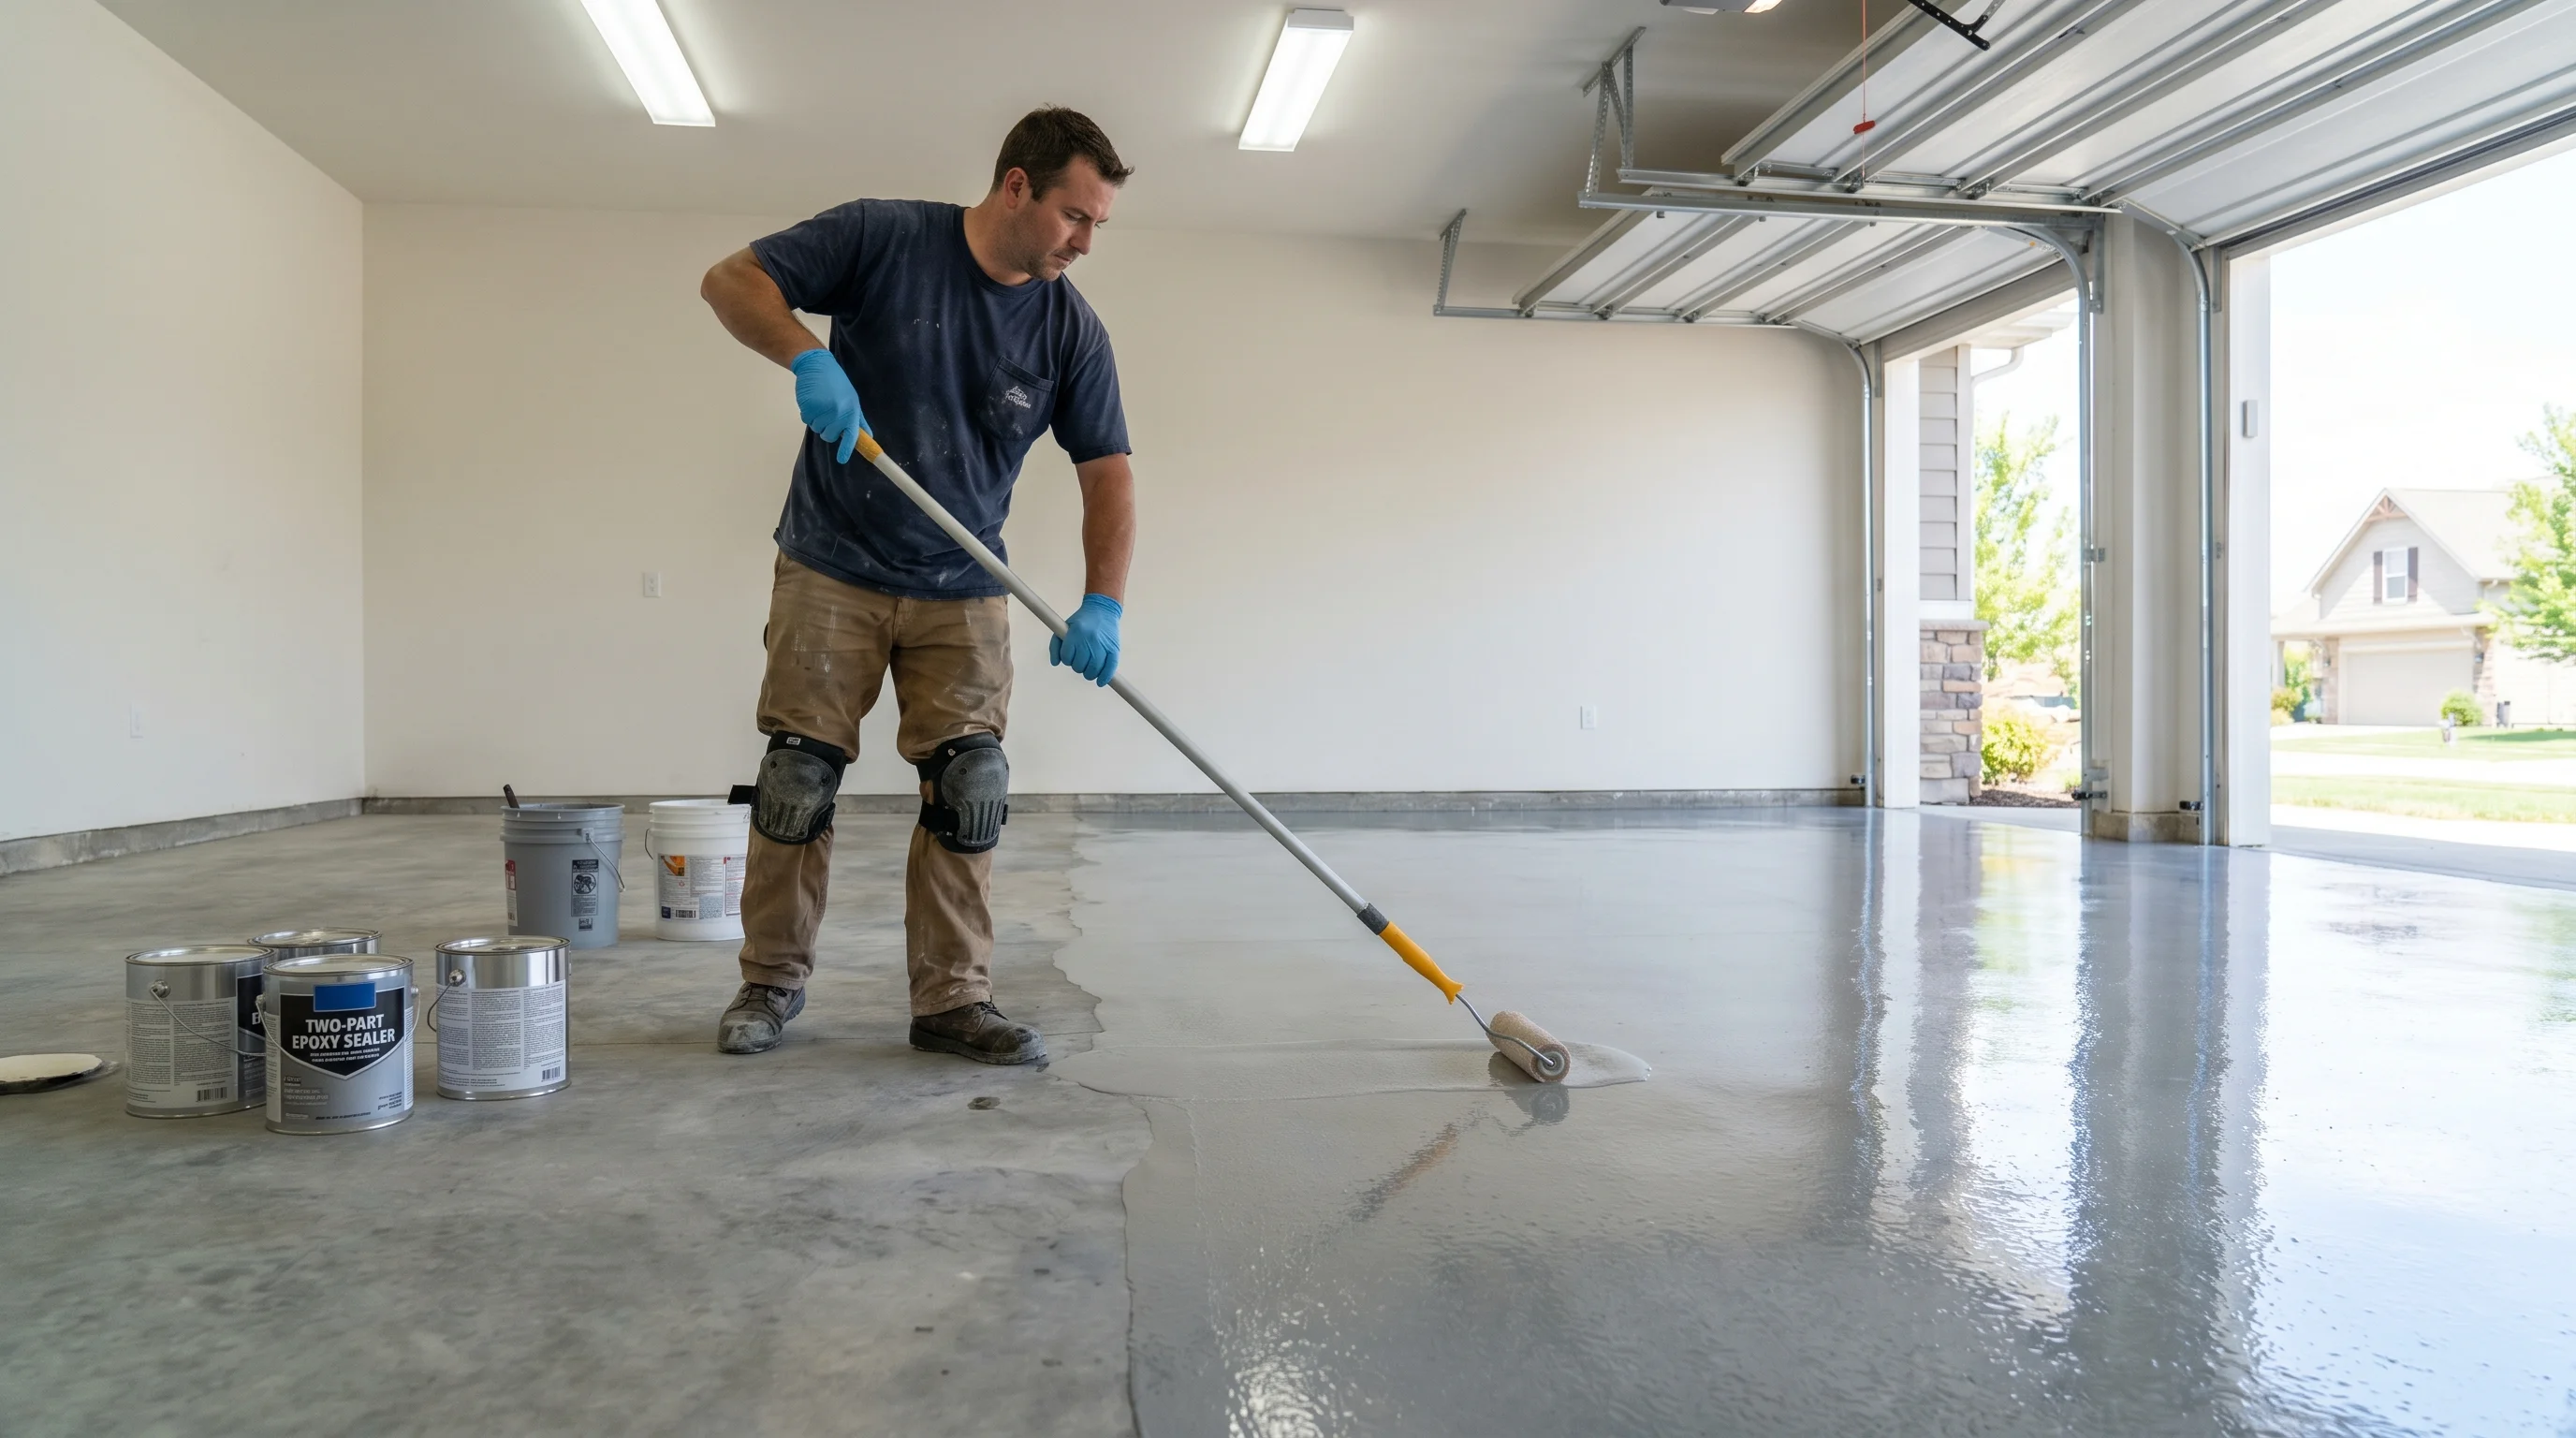
Bare garage floors can be sealed with a penetrating sealer or a densifier to reduce dusting and staining. Many homeowners instead choose an epoxy or polyaspartic coating for a durable, easy-to-clean surface. Coatings need more prep, often grinding, and a moisture test. Hot tire pickup can damage thin sealers on garage floors; see how to get tire marks off concrete.
Common Problems and Fixes
White, cloudy or milky sealer
Usually caused by moisture trapped under a film-forming sealer, applying too thick a coat, or sealing in humid or cold conditions. For solvent-based acrylics, re-wetting with xylene often clears it. Severe cases need stripping and resealing.
Peeling or flaking sealer
Poor adhesion from a dirty or damp surface, incompatible sealers, or too many layers built up over years. Strip and start fresh.
Slippery surface
Film-forming sealers can be slick when wet. Add an anti-slip grit additive to the final coat, or switch to a penetrating sealer.
Bubbles
From applying in hot sun, thick coats, or rolling too fast. Apply in the shade or cooler parts of the day, in thin coats.
Uneven, blotchy look
Uneven application or porosity. Backroll for even coverage and apply a second thin coat if needed.
Sealer did not soak in
The concrete may still have an old sealer, curing compound or contamination on it. Test with water and clean or strip as needed.
Water-Based vs Solvent-Based Sealers
Both penetrating and acrylic sealers come in water-based and solvent-based versions. Solvent-based products usually penetrate deeper, darken and enhance color more, and tolerate cooler application temperatures, but they have strong fumes, are flammable, and are restricted in some regions because of volatile organic compound (VOC) rules. Water-based products have low odor, clean up with water, and are easier to use around homes, but they can be more sensitive to application conditions and may give a lighter look. When resealing, match the base of the old sealer if possible: a water-based acrylic over an old solvent-based acrylic, or the reverse, can have adhesion or appearance problems. Test a small area first.
A Worked Example: Resealing a Stamped Patio
Say a homeowner has a stamped concrete patio sealed with a solvent-based acrylic three years ago. It now looks dull in the walking path and slightly white in one low corner.
- Test: water soaks in on the worn path and beads on the edges, so the sealer is partly gone.
- Fix the haze: on a dry, warm day, they roll a thin coat of xylene over the white corner. The old acrylic softens, the trapped moisture escapes, and the haze clears.
- Clean: they scrub the whole patio with a concrete cleaner and rinse well, then let it dry for two full days of sunny weather.
- Seal: they apply a solvent-based acrylic sealer matching the original, in two thin coats with a roller, adding anti-slip grit to the second coat.
- Wait: the patio is dry to the touch in a few hours, and furniture goes back the next day.
The color is rich again, the surface is not slippery, and the next reseal is planned in about three years.
Safety When Sealing Concrete
- Read the label and safety data sheet before you start.
- Ventilate well, especially in garages; solvent fumes build up quickly.
- Use a respirator rated for organic vapors with solvent-based products.
- Keep flames, pilot lights, cigarettes and sparks away from solvent-based sealers.
- Wear gloves and eye protection.
- Protect plants, lawns and nearby surfaces from overspray.
- Keep children and pets off until the sealer is dry.
- Dispose of leftover product and rags as the label and local rules require; solvent-soaked rags can be a fire risk.
DIY or Hire a Pro?
Resealing a driveway or patio with a penetrating or water-based sealer is a straightforward DIY job for most homeowners. It takes a day to clean, a day or two to dry, and a few hours to apply. Hiring a pro makes sense for large areas, decorative concrete with haze or peeling, when the old sealer must be stripped, or for garage floor coatings that need grinding. Contractors often price sealing by the square foot, with extra charges for stripping and repairs. See concrete sealing near me for what to expect.
Resealing Checklist
- Water test shows the concrete absorbs water.
- Old sealer type identified and new sealer chosen to match.
- Stains, oil and rust removed.
- Cracks and joints repaired and sealed.
- Surface clean and completely dry.
- Forecast dry for at least 24 hours, temperatures in the label range.
- Plants, walls and doors protected.
- Thin, even coats applied; anti-slip grit added where needed.
- Traffic kept off for the label's dry times.
Learning how to reseal concrete properly is mostly about prep and patience. A clean, dry surface and thin coats of the right sealer give you years of protection; rushing either step is what causes haze, peeling and wasted product.
How Long Does Concrete Sealer Take to Dry by Type?
The type of concrete sealer you choose makes a big difference in drying time:
- Water-based penetrating sealer: often dry to the touch within an hour or two in warm weather, light foot traffic in several hours to a day, vehicles in about a day or two.
- Solvent-based penetrating sealer: similar or slightly faster drying, with strong odor for the first hours.
- Water-based acrylic sealer: dry to the touch in about 1 to 3 hours, recoat in a few hours, foot traffic in about a day, vehicles in a few days.
- Solvent-based acrylic sealer: often dries to the touch within an hour, but a full cure takes longer; avoid heavy traffic for a couple of days.
- Epoxy and urethane coatings: often walkable in about a day, vehicles after several days, with full chemical resistance after about a week, depending on the system.
Cool temperatures, high humidity, shade and thick coats can double these times. When in doubt about how long concrete sealer takes to dry on your project, wait longer, especially before driving on it.
Reseal Schedule by Surface
- Driveways with a penetrating sealer: test every year; reseal concrete when water stops beading, often every several years.
- Stamped or colored patios with acrylic sealer: reseal about every 2 to 3 years, sooner in heavy traffic or hot sun.
- Pool decks: about every 1 to 3 years because of water, chemicals and bare-foot traffic.
- Steps and walks in salt areas: test each fall; resealing concrete before winter protects it most.
- Garage floors with sealer: as wear appears near the door and under tires; coatings last much longer.
Keeping a simple log of when and with what you last sealed each surface makes resealing concrete easier and keeps you from mixing incompatible sealers years later.
What Not to Do When Resealing
- Do not seal dirty concrete: sealer locks in dirt, oil and stains.
- Do not seal damp concrete: moisture under film-forming sealers causes white haze and peeling.
- Do not apply thick coats: two thin coats beat one heavy one every time.
- Do not mix sealer types blindly: an acrylic over a penetrating sealer may not bond, and a water-based acrylic over a solvent-based one can haze.
- Do not seal in direct midday sun or right before rain: both cause problems with appearance and curing.
- Do not let puddles sit: backroll or broom out pooled sealer, especially in stamped texture.
- Do not skip the test patch: a small hidden area shows how the sealer looks and bonds before you commit to the whole surface.
- Do not drive on it too soon: warm tires can lift, mark or peel soft sealer.
Avoiding these mistakes is most of the work. When you follow the steps above, learning how to reseal concrete becomes a quick, routine part of caring for a driveway, patio or garage, rather than a frustrating project you have to redo next season.
Frequently Asked Questions
How often should you reseal concrete?
Acrylic sealers often every 1 to 3 years; penetrating sealers every several years. Use the water bead test.
How long does concrete sealer take to dry?
Often 1 to 4 hours to touch, about 24 hours for foot traffic and about 48 to 72 hours for vehicles. Follow the label.
Can I put a new sealer over an old one?
Yes, if it is the same type and compatible. Otherwise strip the old sealer first.
How soon can you seal new concrete?
Many sealers recommend waiting about 28 days; some cure-and-seal products go on right after finishing. Follow the label.
Should I seal my concrete driveway?
In freeze-thaw and salt areas, yes. A penetrating sealer reduces scaling and staining.
Why did my sealer turn white?
Usually moisture trapped under the sealer or coats applied too thick. Solvent-based acrylics can often be re-wetted with xylene to release it.
Can you seal concrete in the cold?
Most sealers need temperatures above about 50°F during application and drying. Cold slows drying and can cause haze.
Does sealing concrete make it slippery?
Film-forming acrylics can. Penetrating sealers usually do not. Add anti-slip grit to acrylics in walking areas.
How long does concrete sealer last?
Acrylics often 1 to 3 years in traffic areas; penetrating sealers several years, depending on product and exposure.
Can it rain after sealing concrete?
Most sealers need at least about 24 hours without rain. Check the label before starting.
Sources
- Portland Cement Association, concrete durability and protection. cement.org
- Concrete sealer manufacturer application instructions and data sheets.
- Image credits: images and chart by Asphapro.com.
Always follow your sealer's label. Checked November 2026.